How To Create a Python Virtual Environment
It's a good practice to use a virtual environment to manage your project's dependencies. Create a virtual environment using:
Setup
Step 1 - Install Package
- Install the venv package
sudo apt install python3.12-venv
Step 2 - Create Env
- Create the virtual environment. In this example, we are going to name the venv asenv.
python -m venv asenv
Step 3 - Activate the Virtual Environment
- On Windows:
asenv\Scripts\activate
- On macOS and Linux:
source asenv/bin/activate
Step 4 - Select Virtual Environment in VS Code
- In VS Code select a python file.
- In the status bar at the bottom of the screen, click Select Interpreter

- From the list select the venv
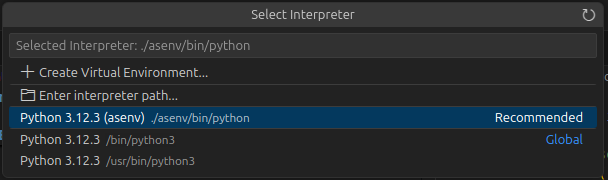
- The selected interpreter in the status bar should now show the venv name.
