Gothic Halloween Buffet Tags with an Adjustable Bowl Clip
Is it Witch's Brew or just punch? Your guests shouldn't have to guess.
If you've ever hosted a Halloween party, you know how it goes. You give every dish a spooky name, set out a beautiful spread, and then spend the night answering "what's in this one?" Paper tent cards fall over, get soggy, or end up in the dip. These tags hang on the bowl itself, so the name stays with the food.
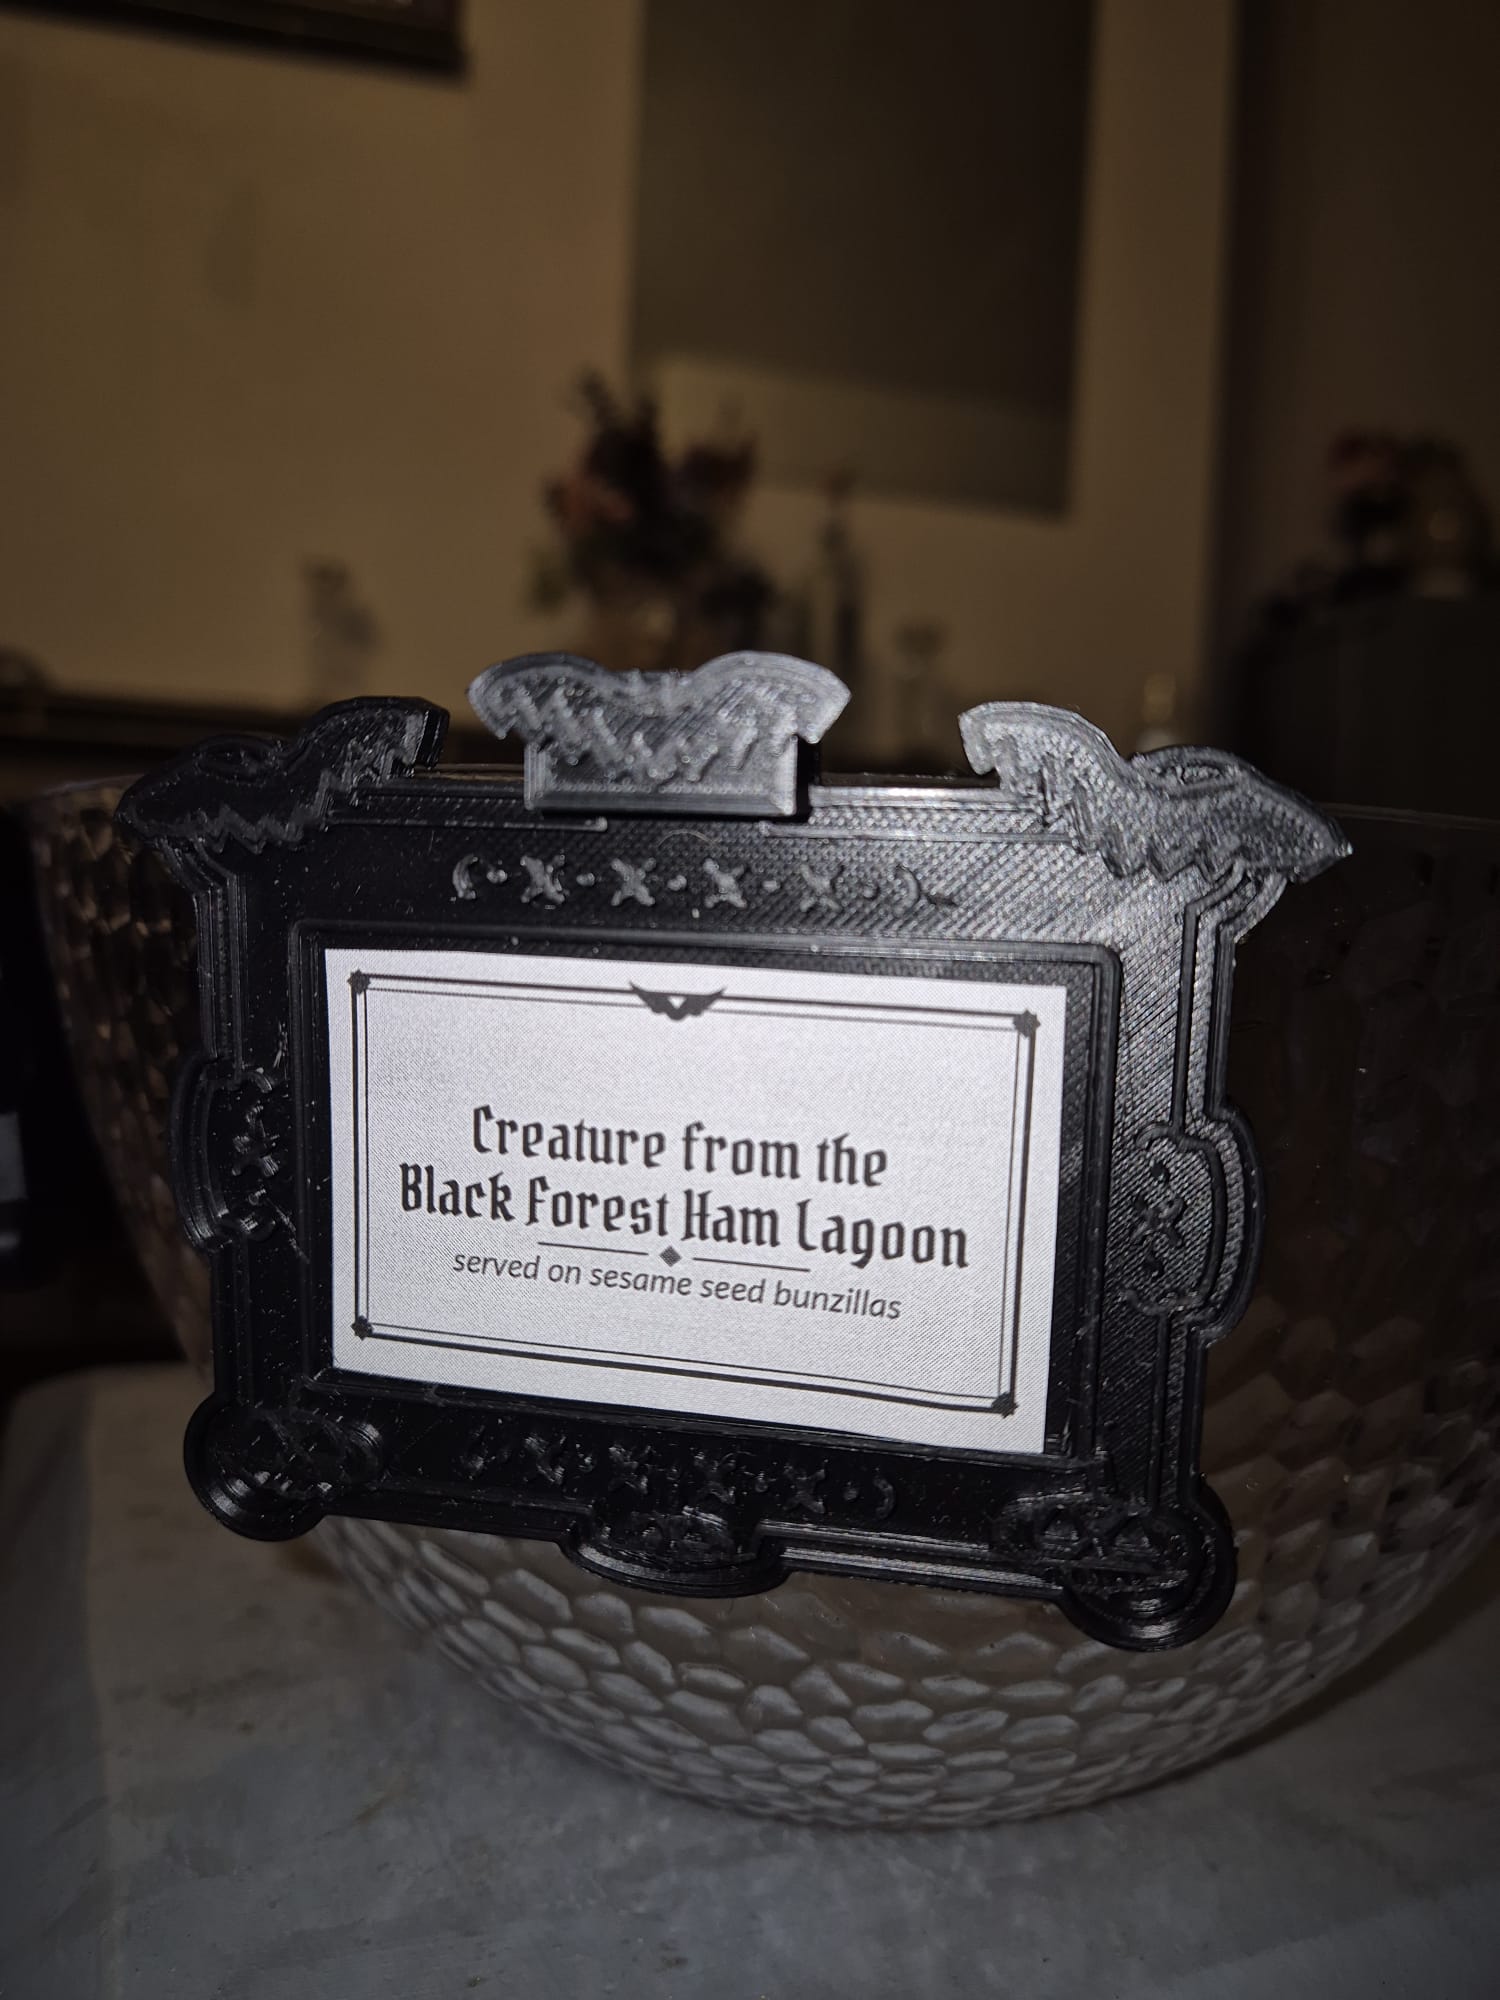
The Inspiration
The idea comes from The Big Bang Theory, Season 6, Episode 5 ("The Holographic Excitation"). Raj plans the Halloween party at Stuart's comic book store with the theme "Food That Goes Bump in the Night". As Sheldon points out, the food isn't actually scary. It's ordinary party food with terrible pun names:
- Creature from the Black Forest Ham Lagoon, on sesame seed bunzillas
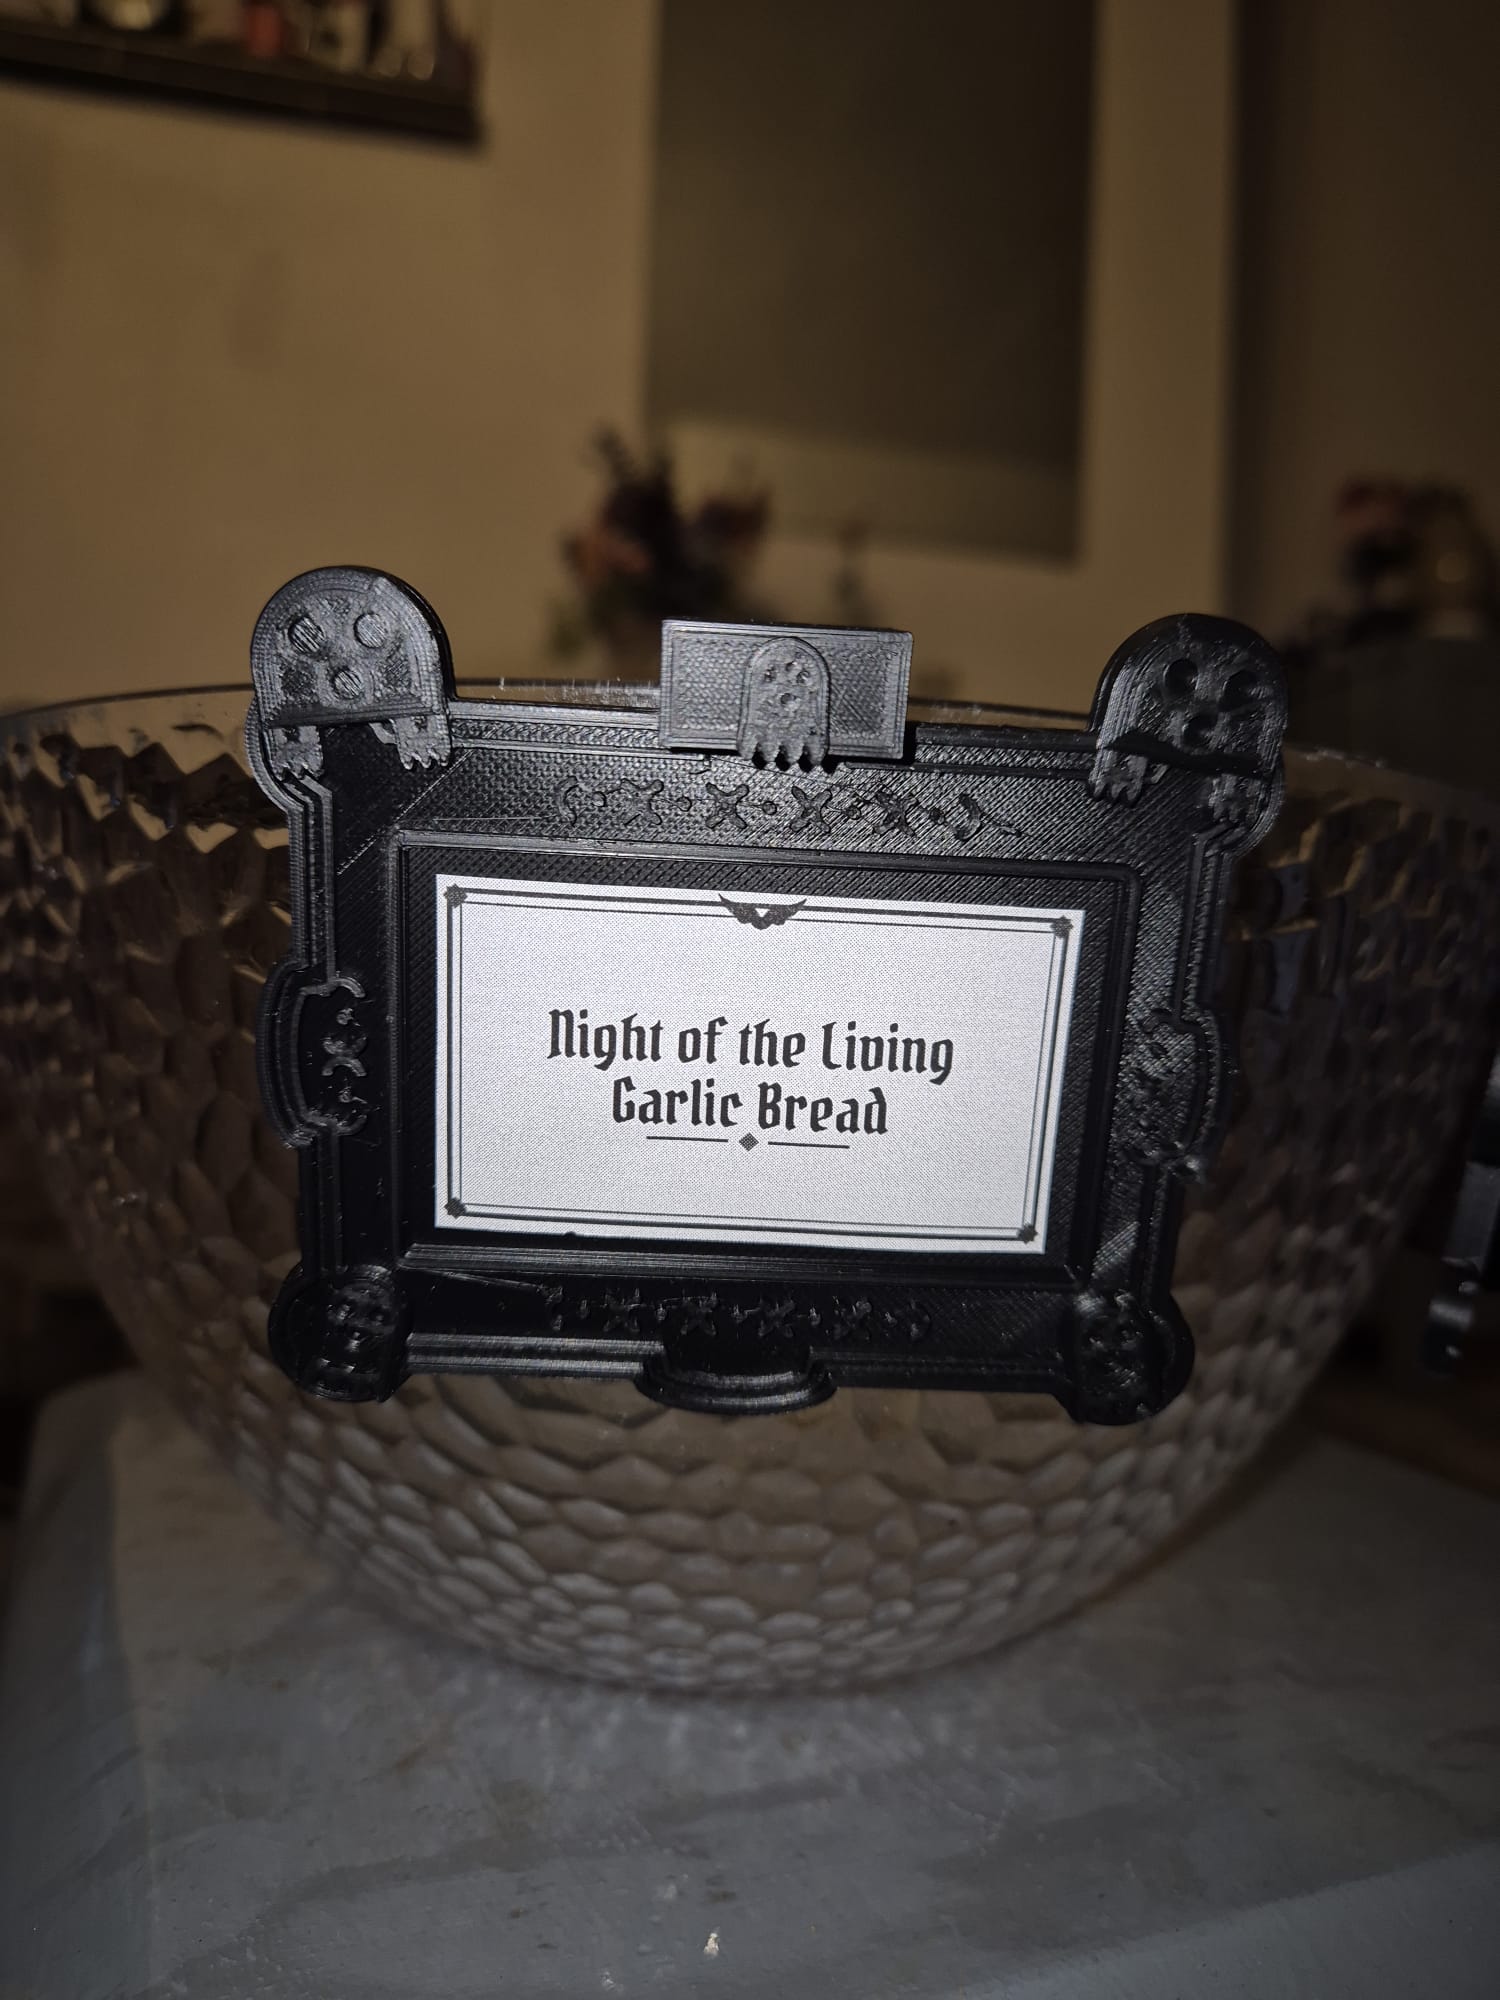
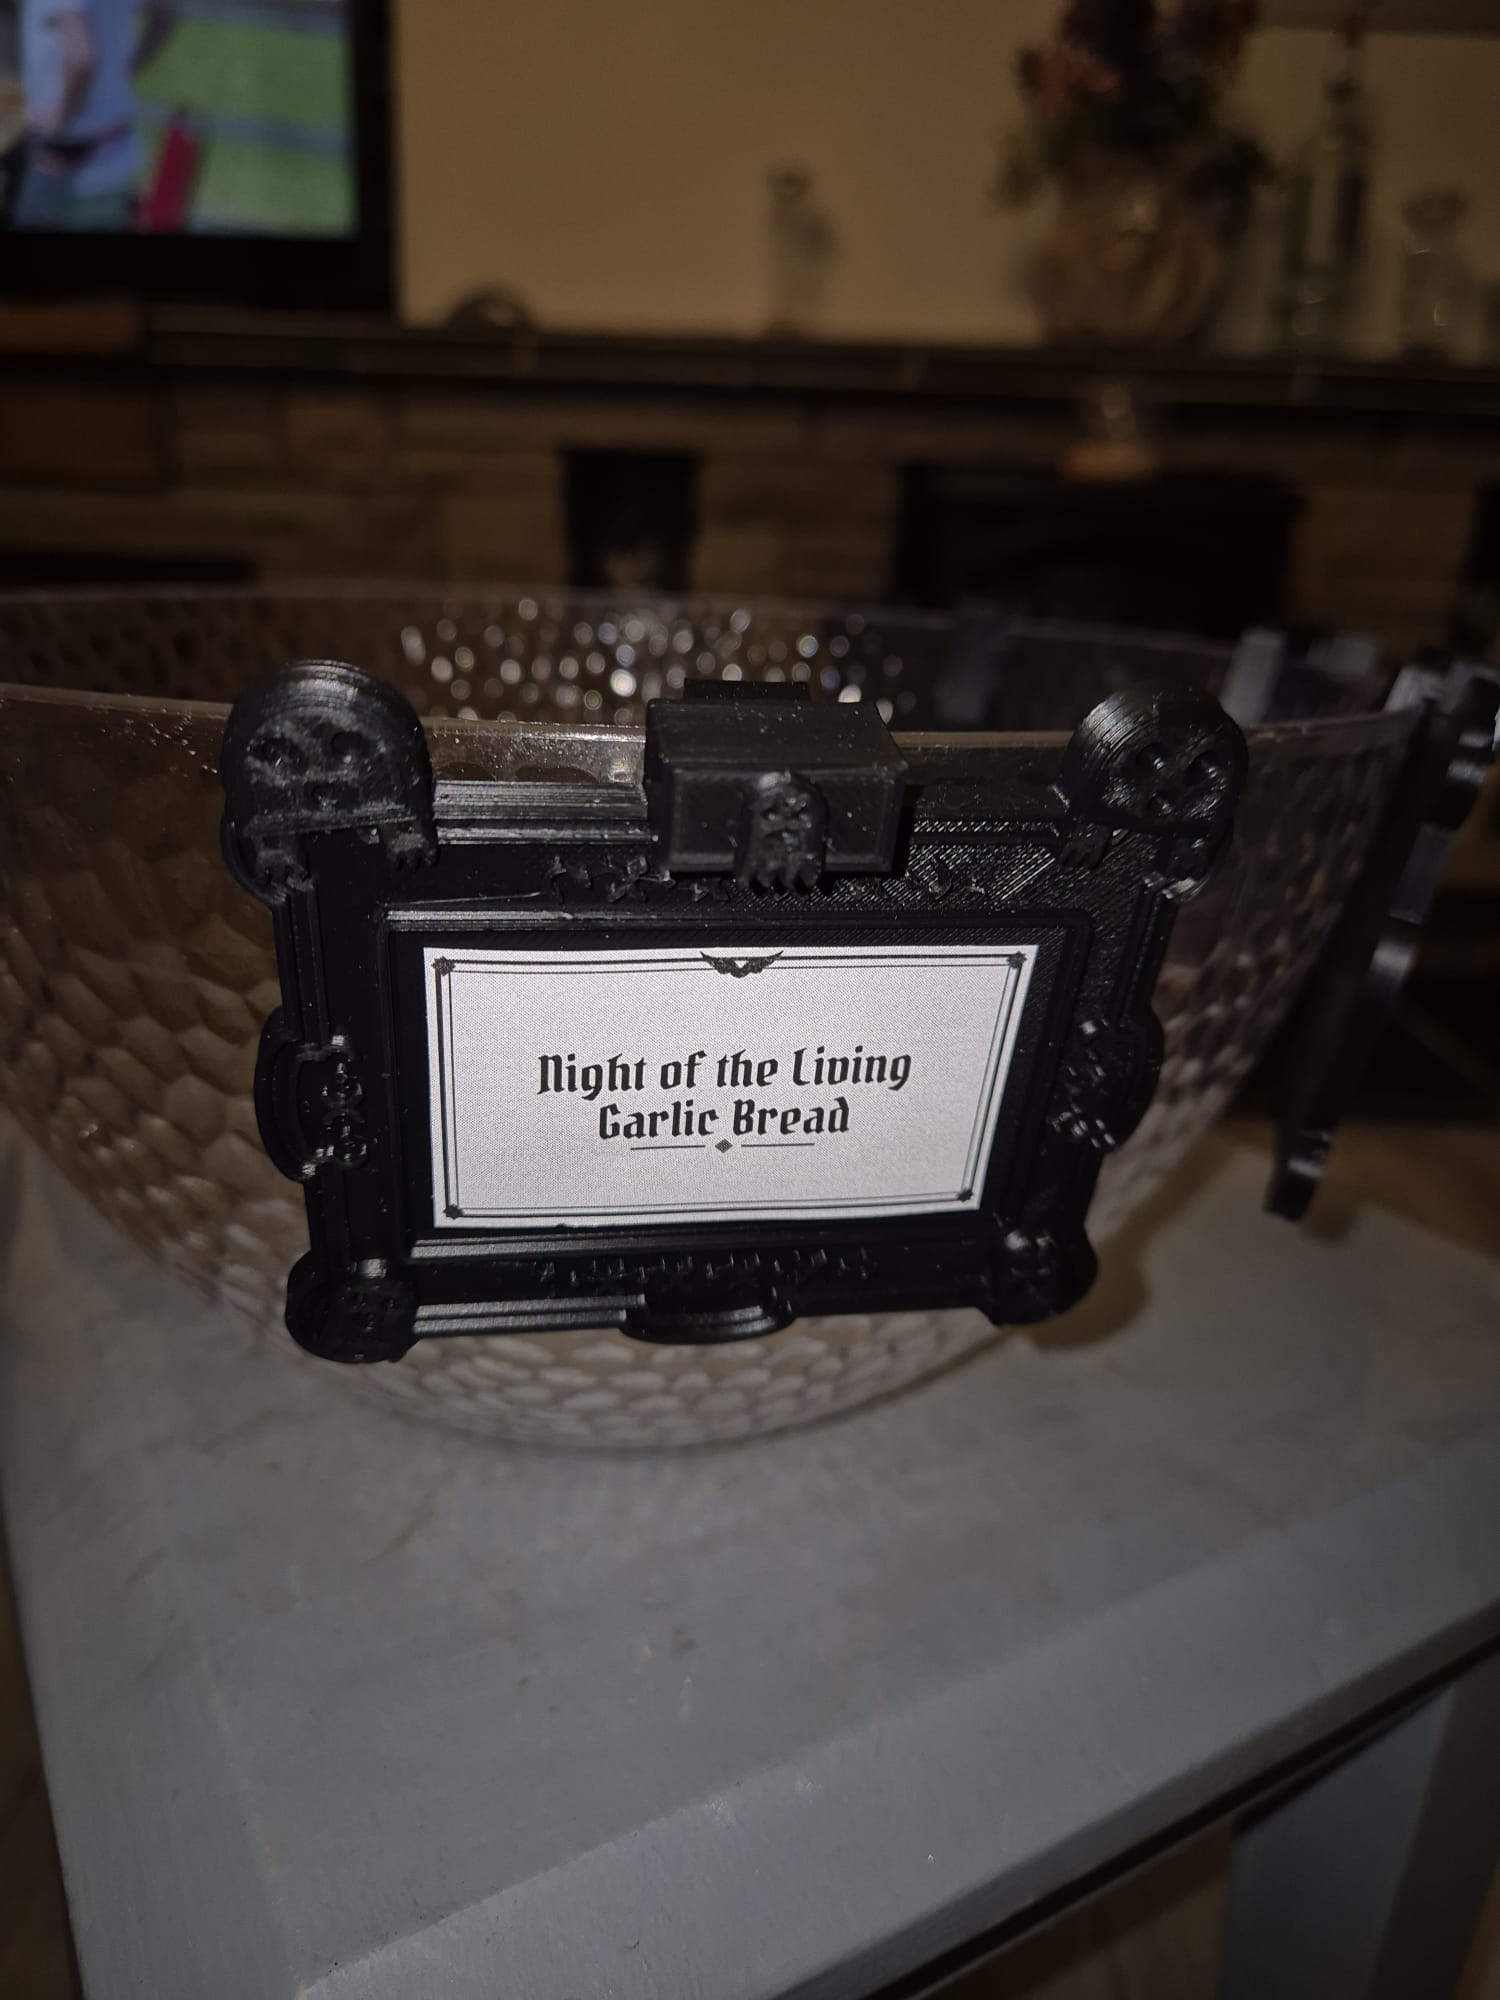
- Night of the Living Garlic Bread (because "bread" sounds like "dead")
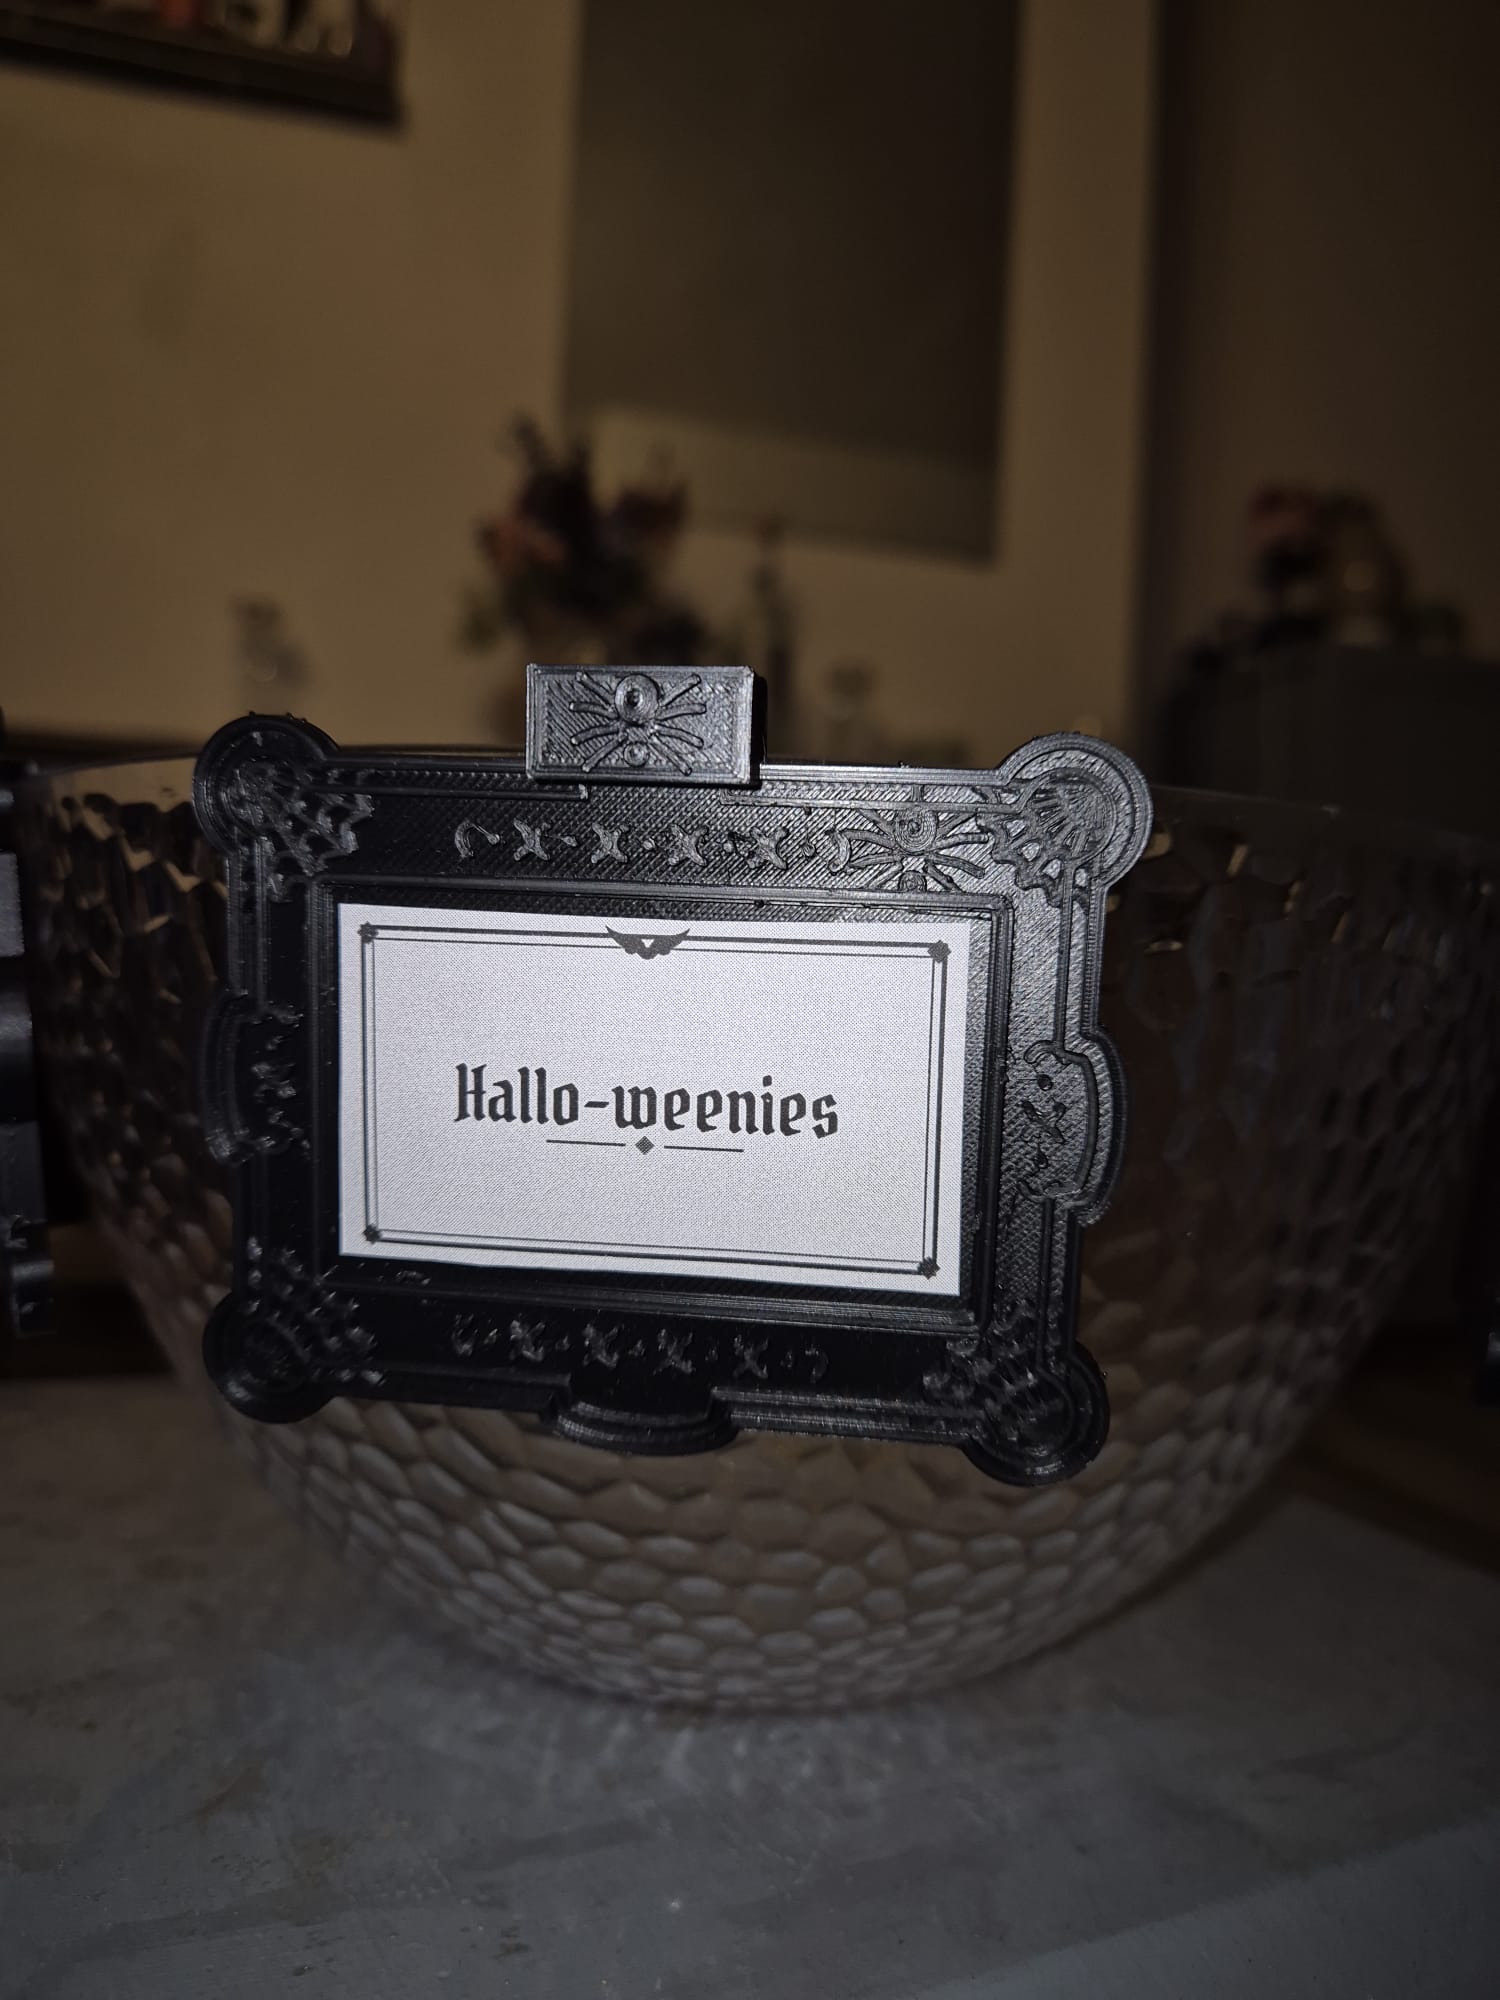
- Hallo-weenies
- Draculoni and Cheese
Raj was onto something, though. A pun name only works if your guests can read it, and Draculoni deserves better than a folded bit of card. So I made a proper gothic frame for it.
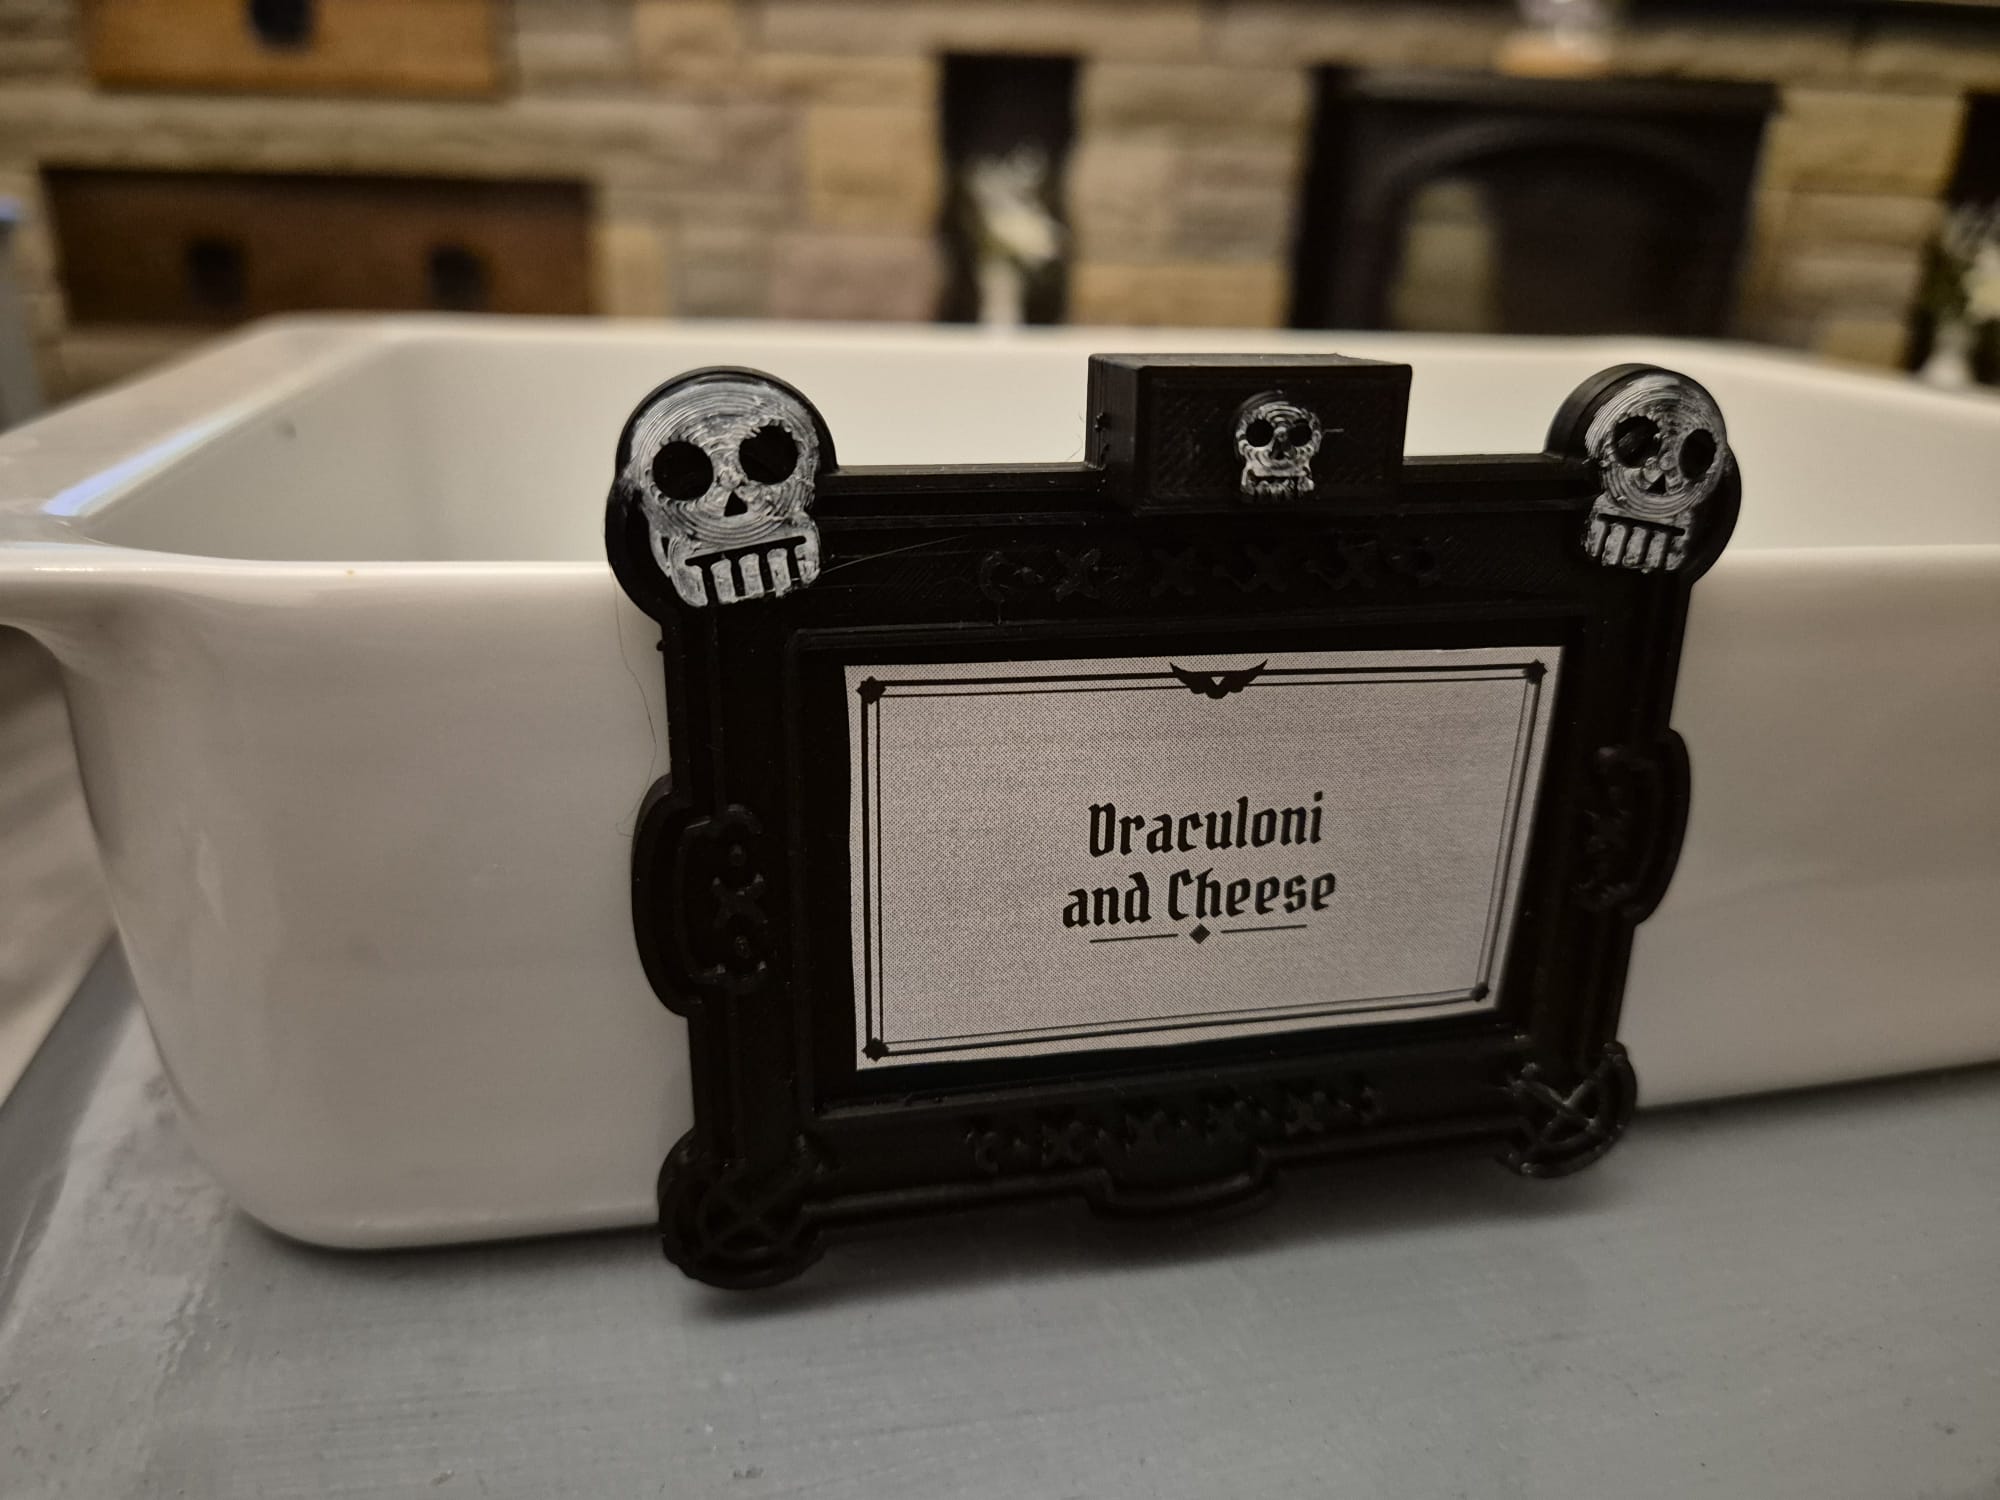
How It Works
The tag prints in two parts:
- Part A – the frame. A flat gothic frame with a recess for a standard 63.5 × 38.1 mm sticky label (21 labels per A4 sheet, the same size as Avery L7160 address labels). Print your menu, stick the labels in, and you're done. Next year, peel them off and rename the dishes.
- Part B – the L-clip. Pushes into a socket in the top of the frame and works like a zip tie. Push it in until the tag grips the bowl and it clicks into place. To take it off, lift the frame slightly and pull.
One clip fits rims from 2 mm to 10 mm thick, from thin plastic party bowls to glass and heavy stoneware. The back of the frame is completely flat, so it sits flush against the side of the bowl. The clip stays hidden behind the top of the frame.
Part A, front
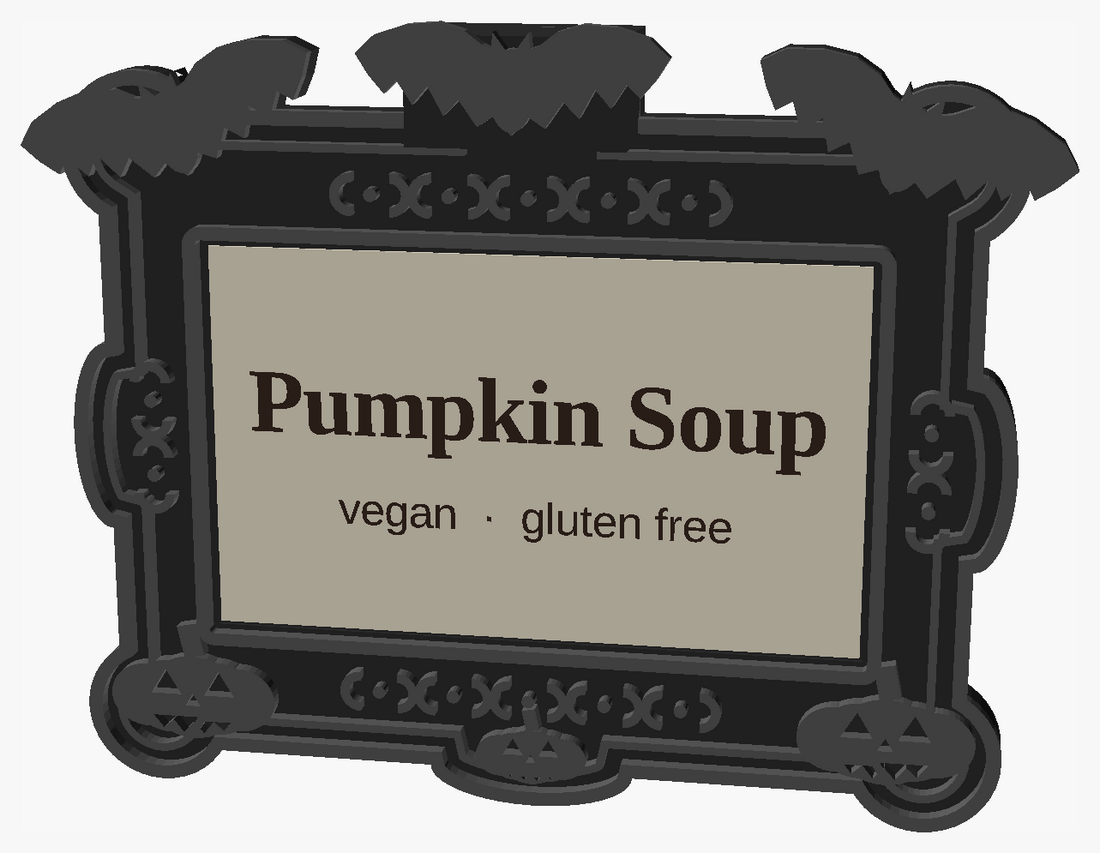
The relief is drawn a shade lighter than the plate so it shows up in the render. The printed part is one colour.
Hung on a bowl
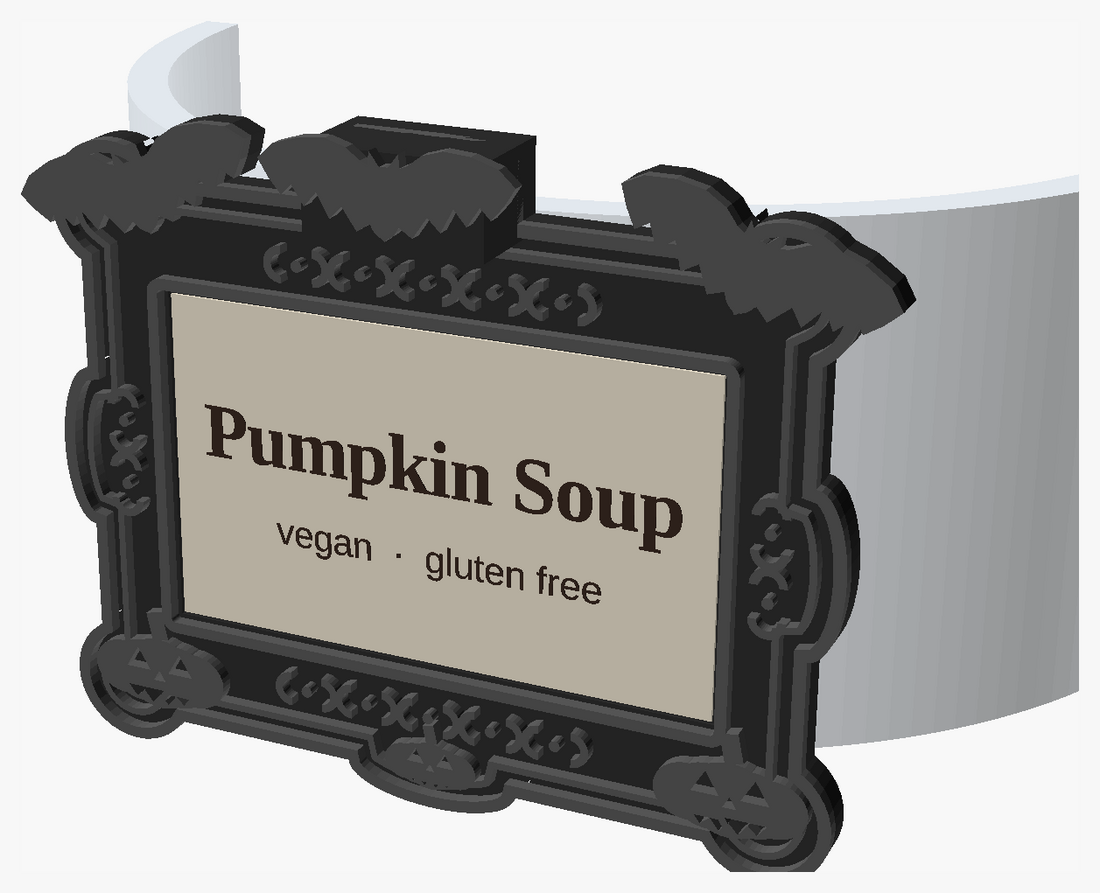
The back of the frame sits flat against the outer wall, and the clip is hidden behind the keystone (the raised block on the top edge).
How the Clip Works
From inside the bowl
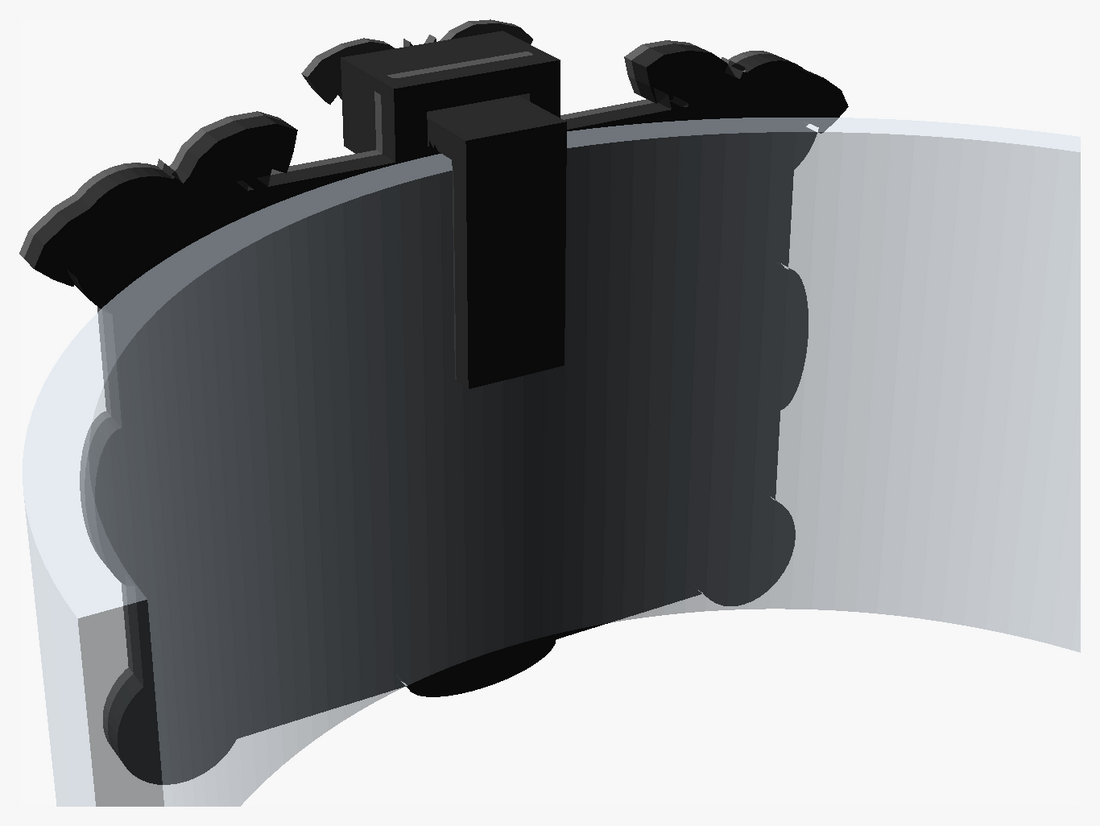
Part B's leg hangs inside the bowl. Its arm crosses the rim and goes into the socket in the keystone.
Part A, back
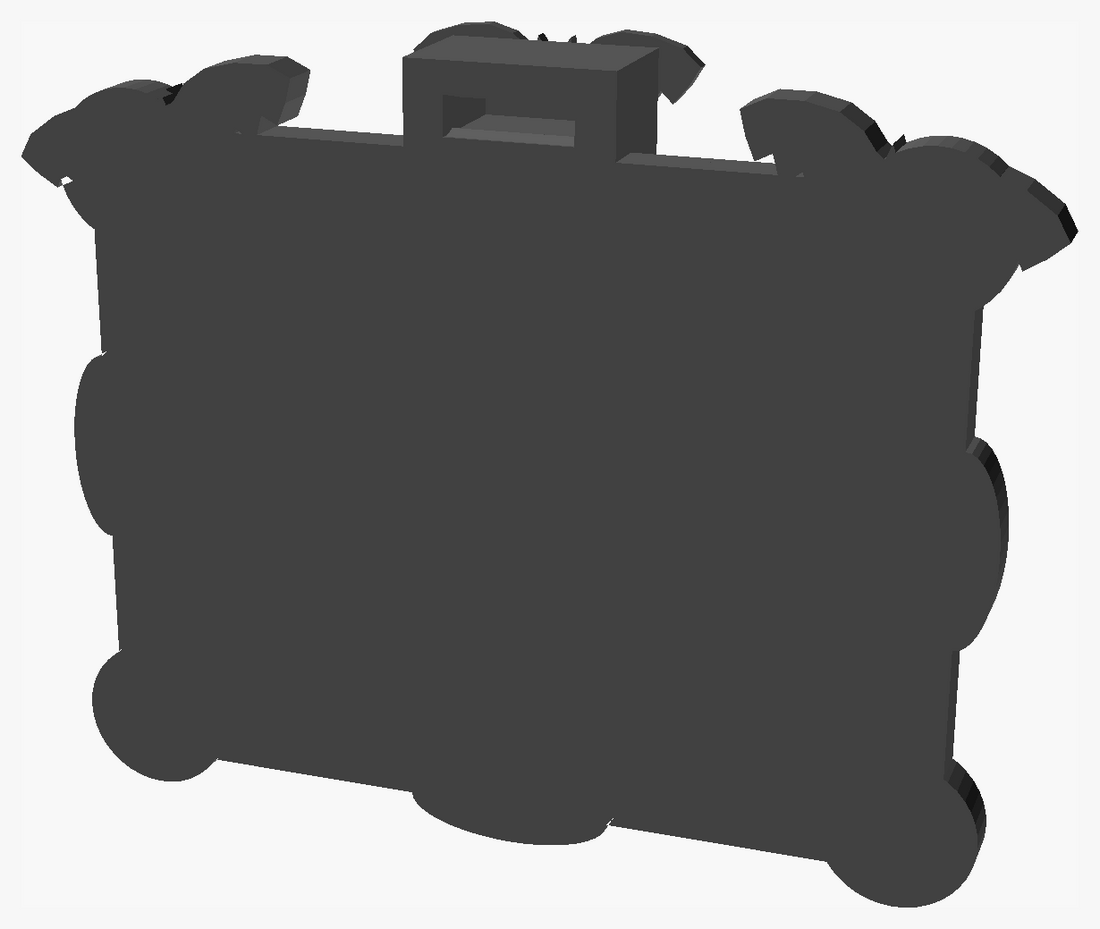
The back is completely flat apart from the 12.4 × 3.8 mm socket, so it sits flush on any bowl.
Part B, the L-clip
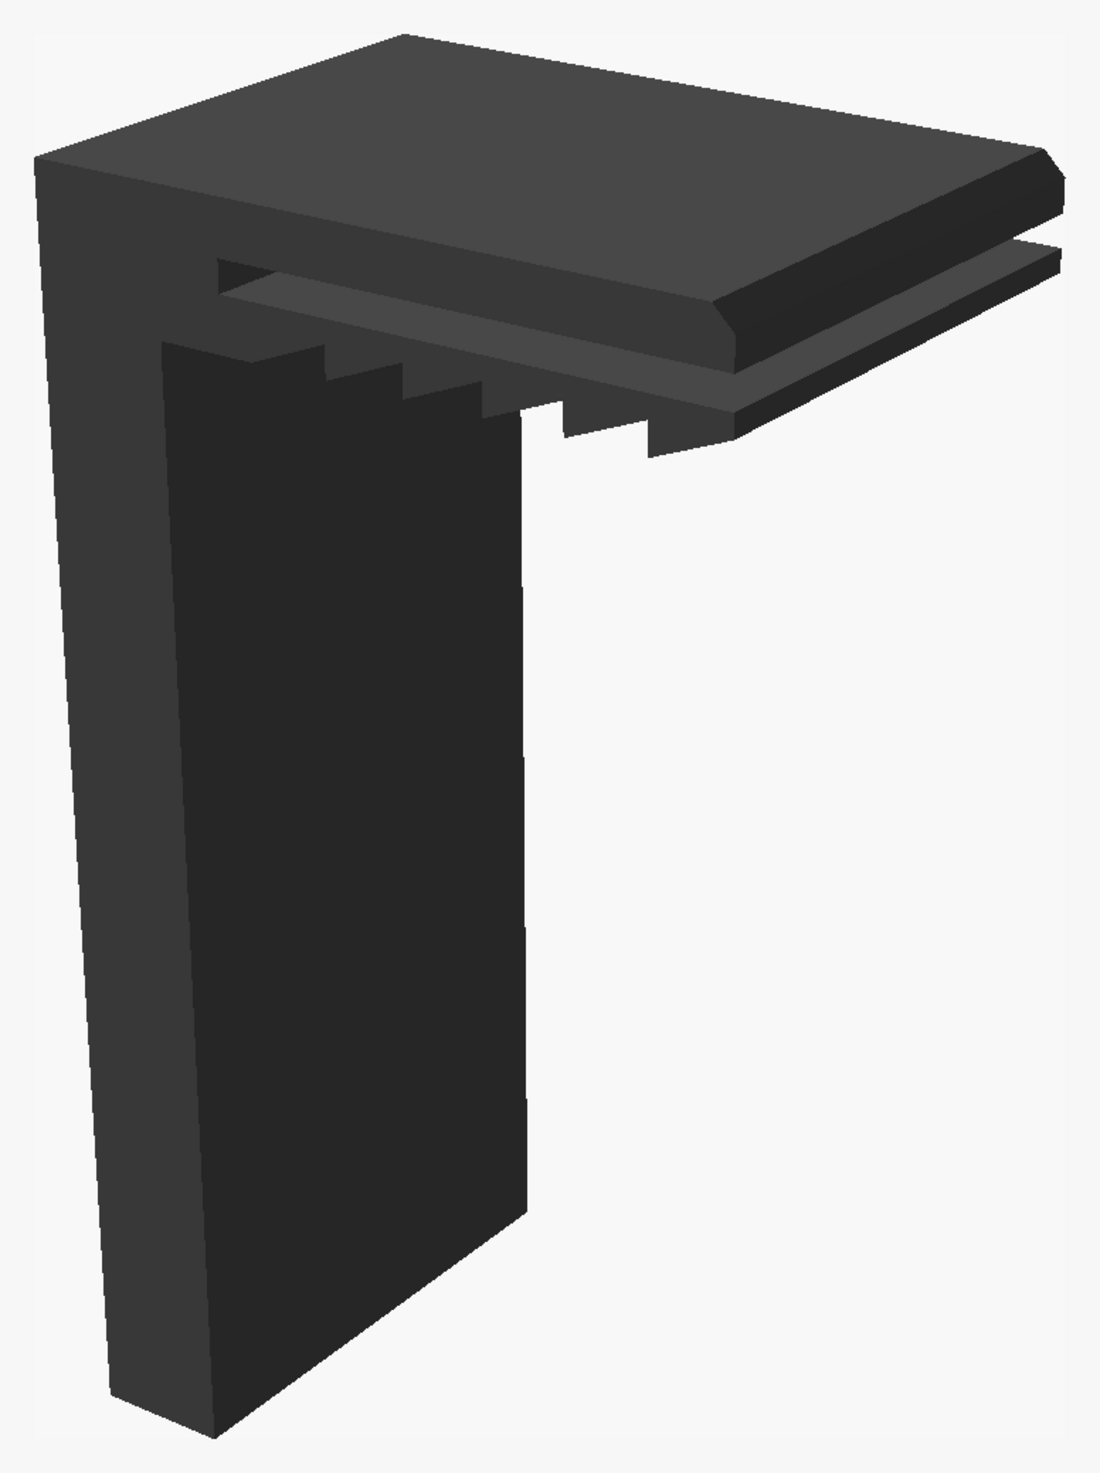
A 13 mm arm with zip-tie teeth on a flexible tongue, and a 25 mm leg. It clicks in with light force and holds when you pull on it.
Print layout
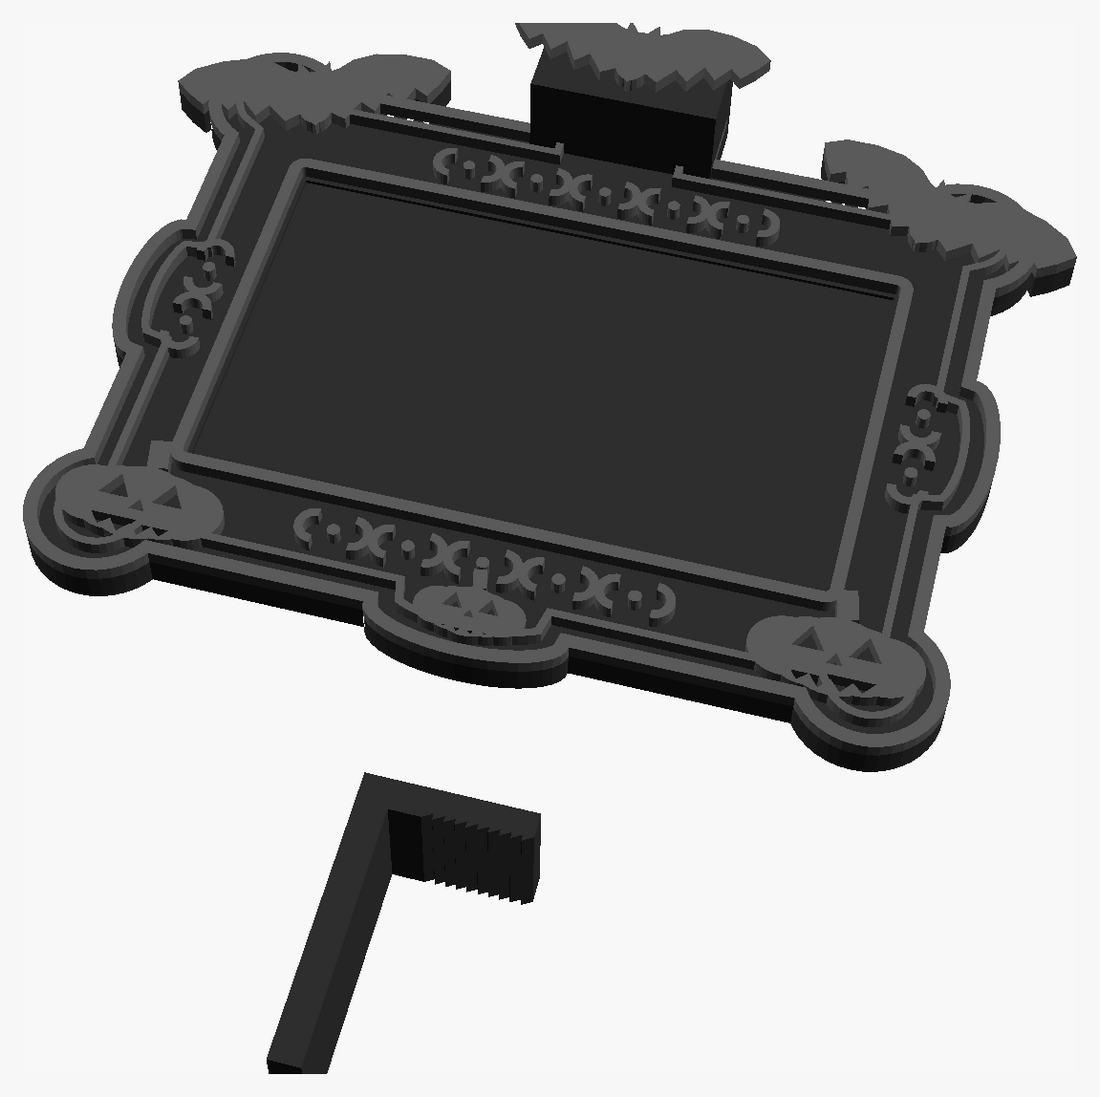
Print the frame face-up and the clip on its side. Every overhang sits flat on the bed, so no supports are needed.
Section through the clip at three rim thicknesses
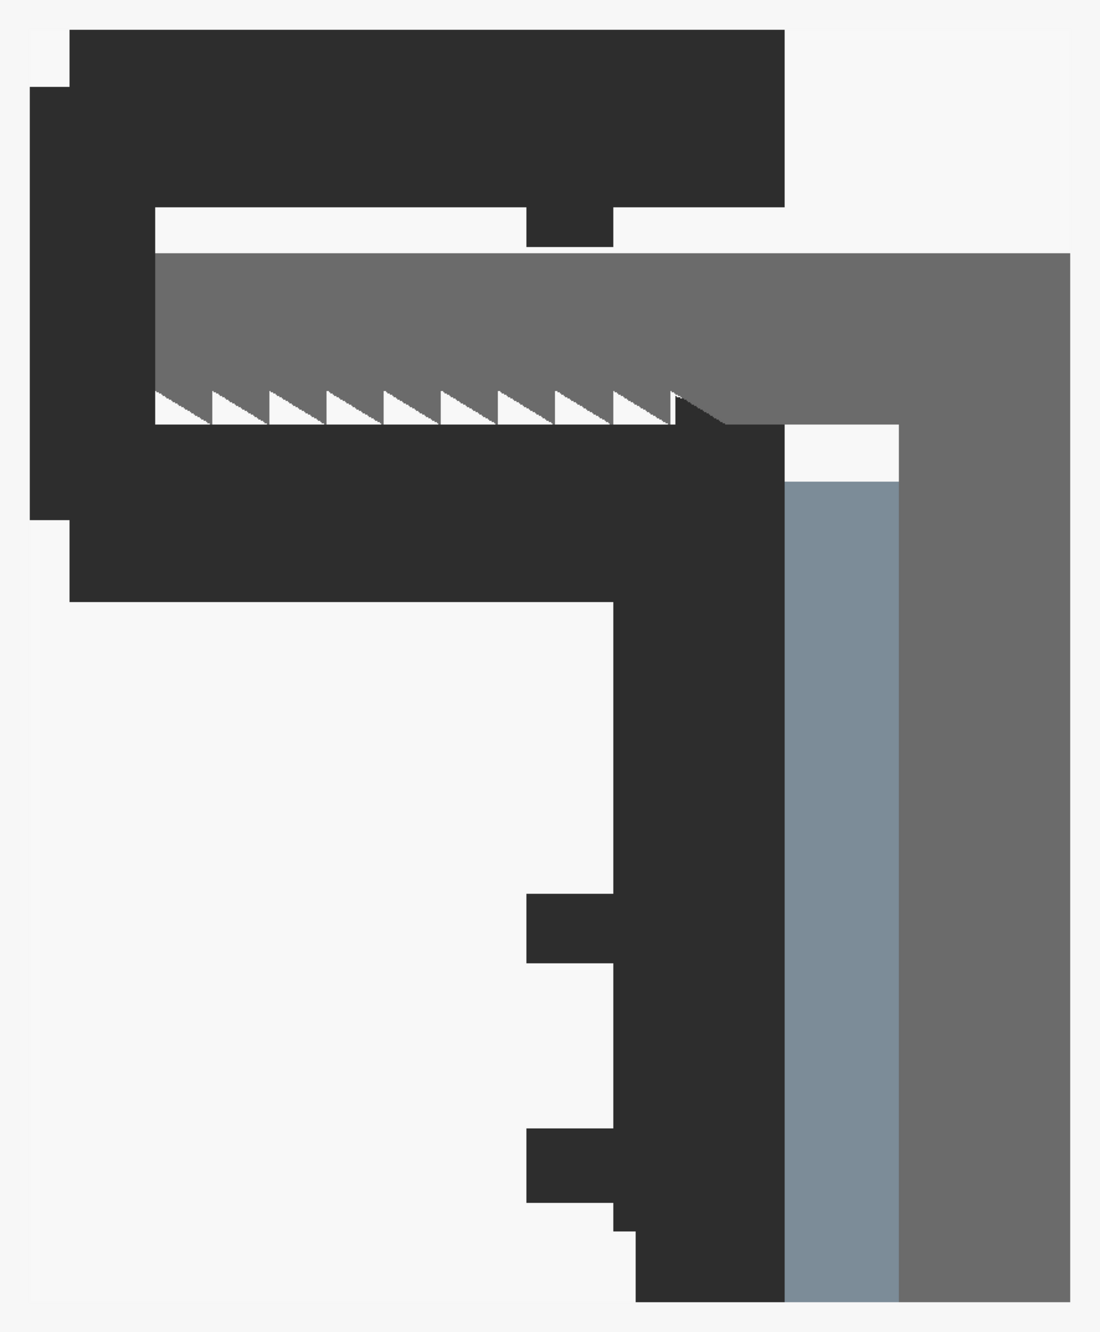
2 mm rim. A thin plastic bowl. The arm is pushed in to its 11 mm stop.

5 mm rim. Glass or thin ceramic. The pawl (dark triangle) sits in a tooth near the entry.
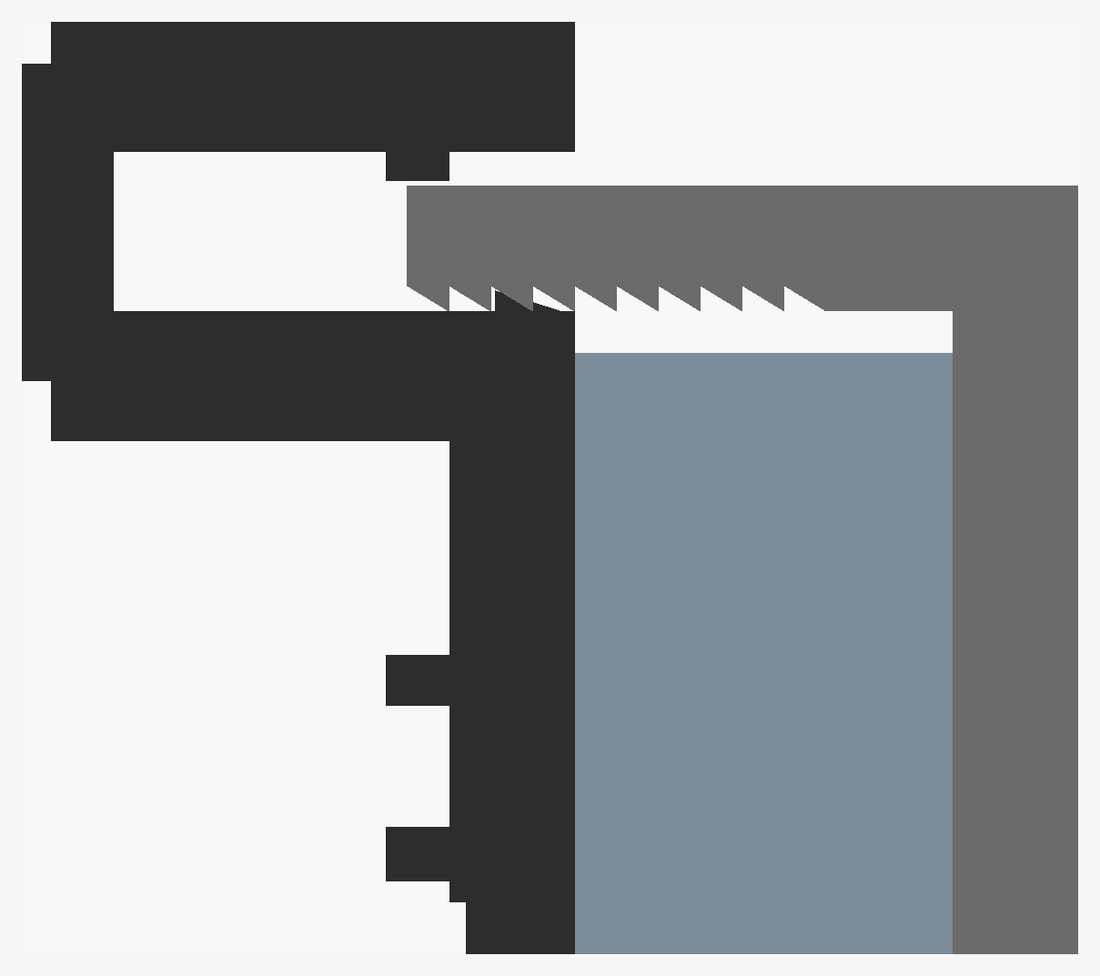
9 mm rim. Heavy stoneware. Four teeth are still engaged.
Reading the sections: the label side is on the left, and the bowl wall (blue-grey) sits between the frame's flat back and the clip's leg. The frame's own weight pulls the socket down onto the arm, which keeps the teeth pressed onto the pawl. To remove the tag, lift the frame a fraction and pull. The 0.8 mm of headroom above the arm lets the teeth clear the pawl.
Four Themes, One Clip
All the frames use the same Part B clip, so you can mix themes across the table:
- Bats & Pumpkins – bats on the top corners, a bat crest, jack-o'-lanterns at the bottom
- Ghosts – ghosts peeking over the top edge
- Spider Webs – corner webs and a spider dangling on its thread
- Skulls – skulls on the top corners and crossed bones below
A blank frame is included too, if you'd like to add your own decorations.
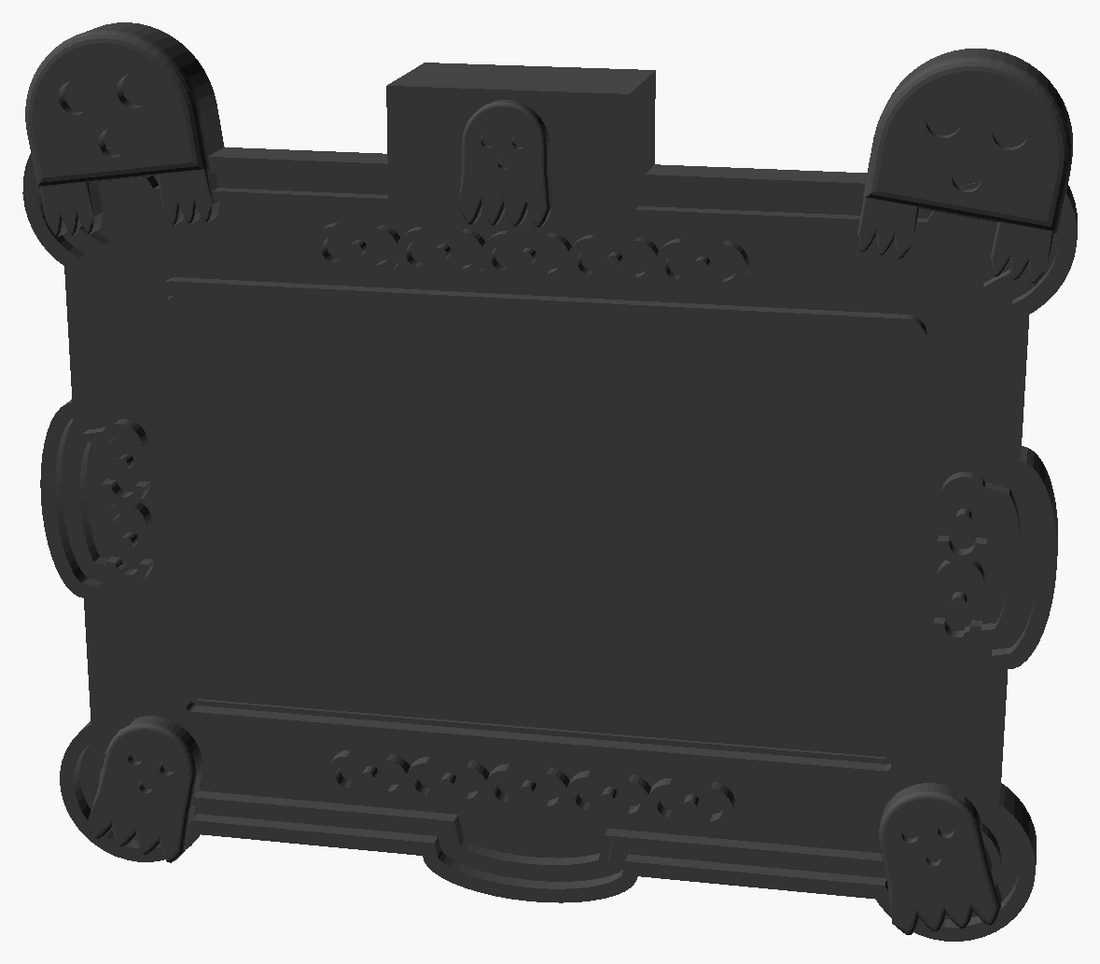
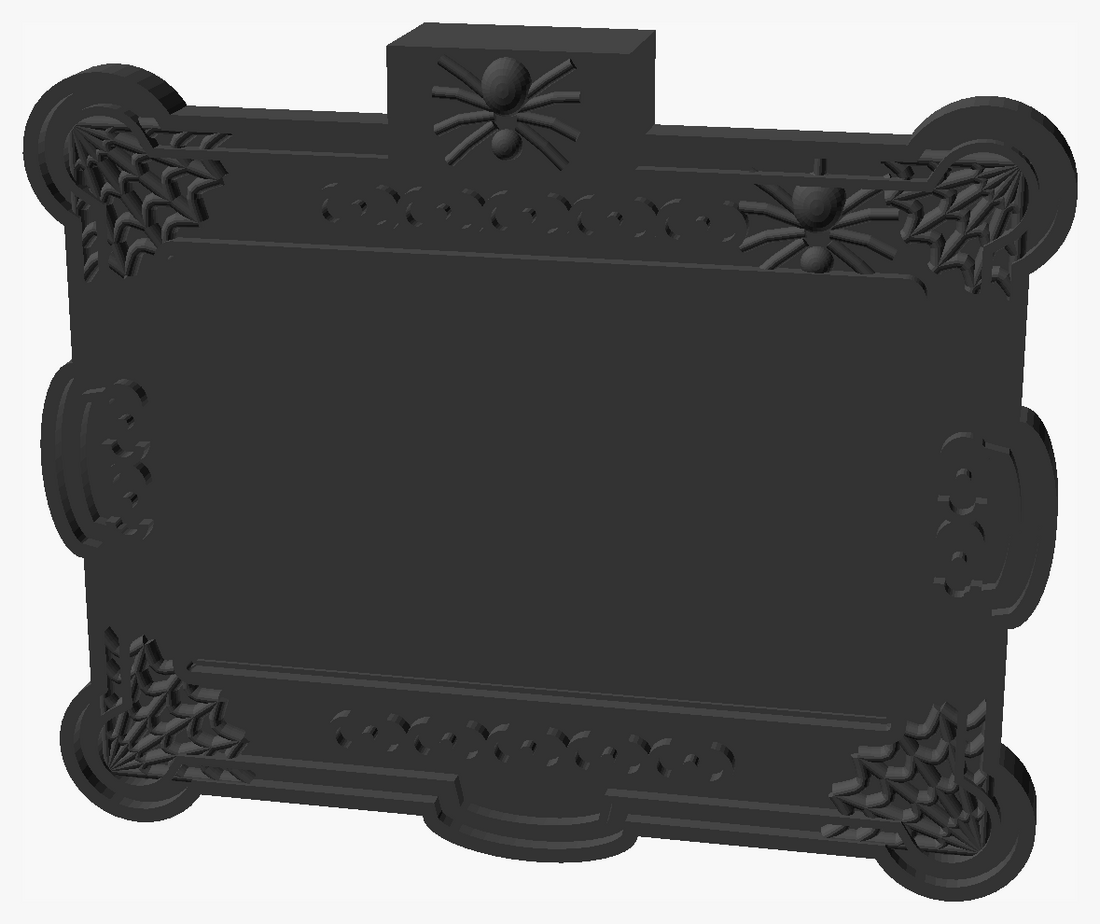
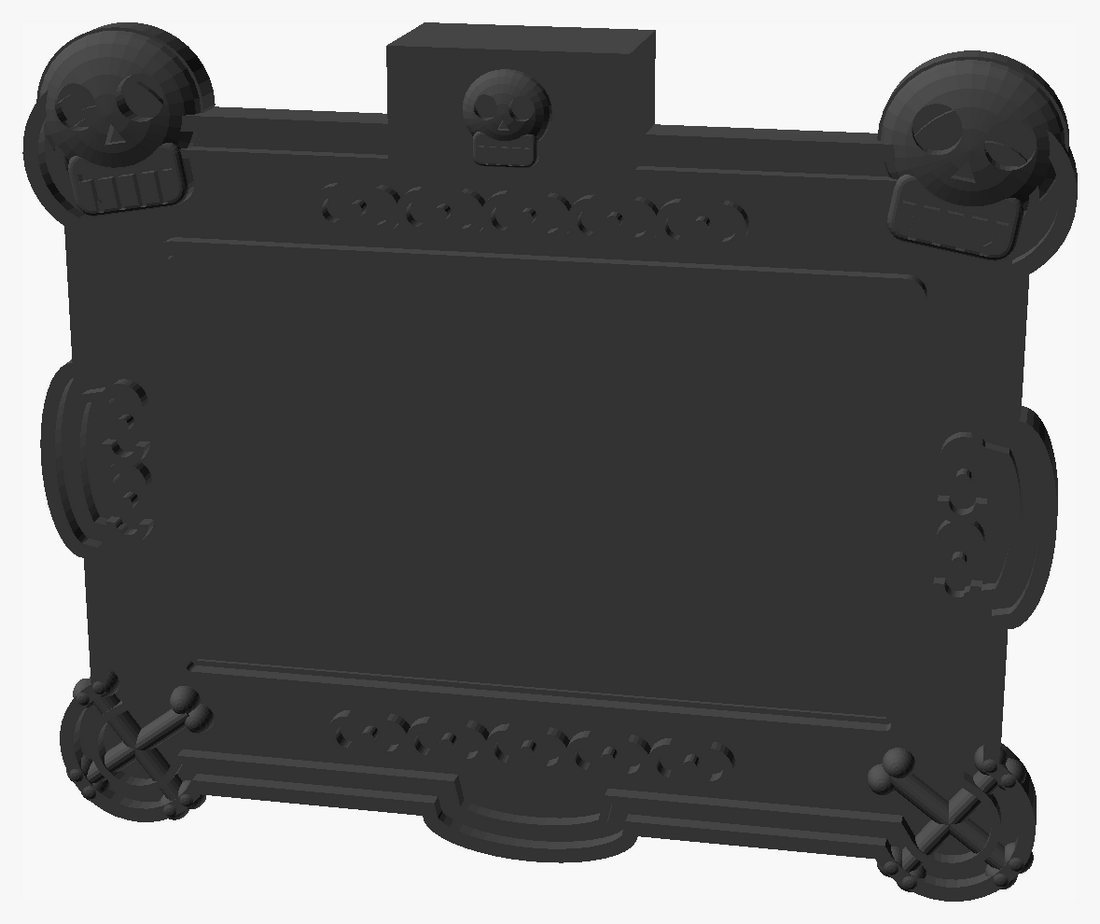
These are single-colour renders straight from the STL files, so the relief is harder to see than in the two-tone views above.
Photos
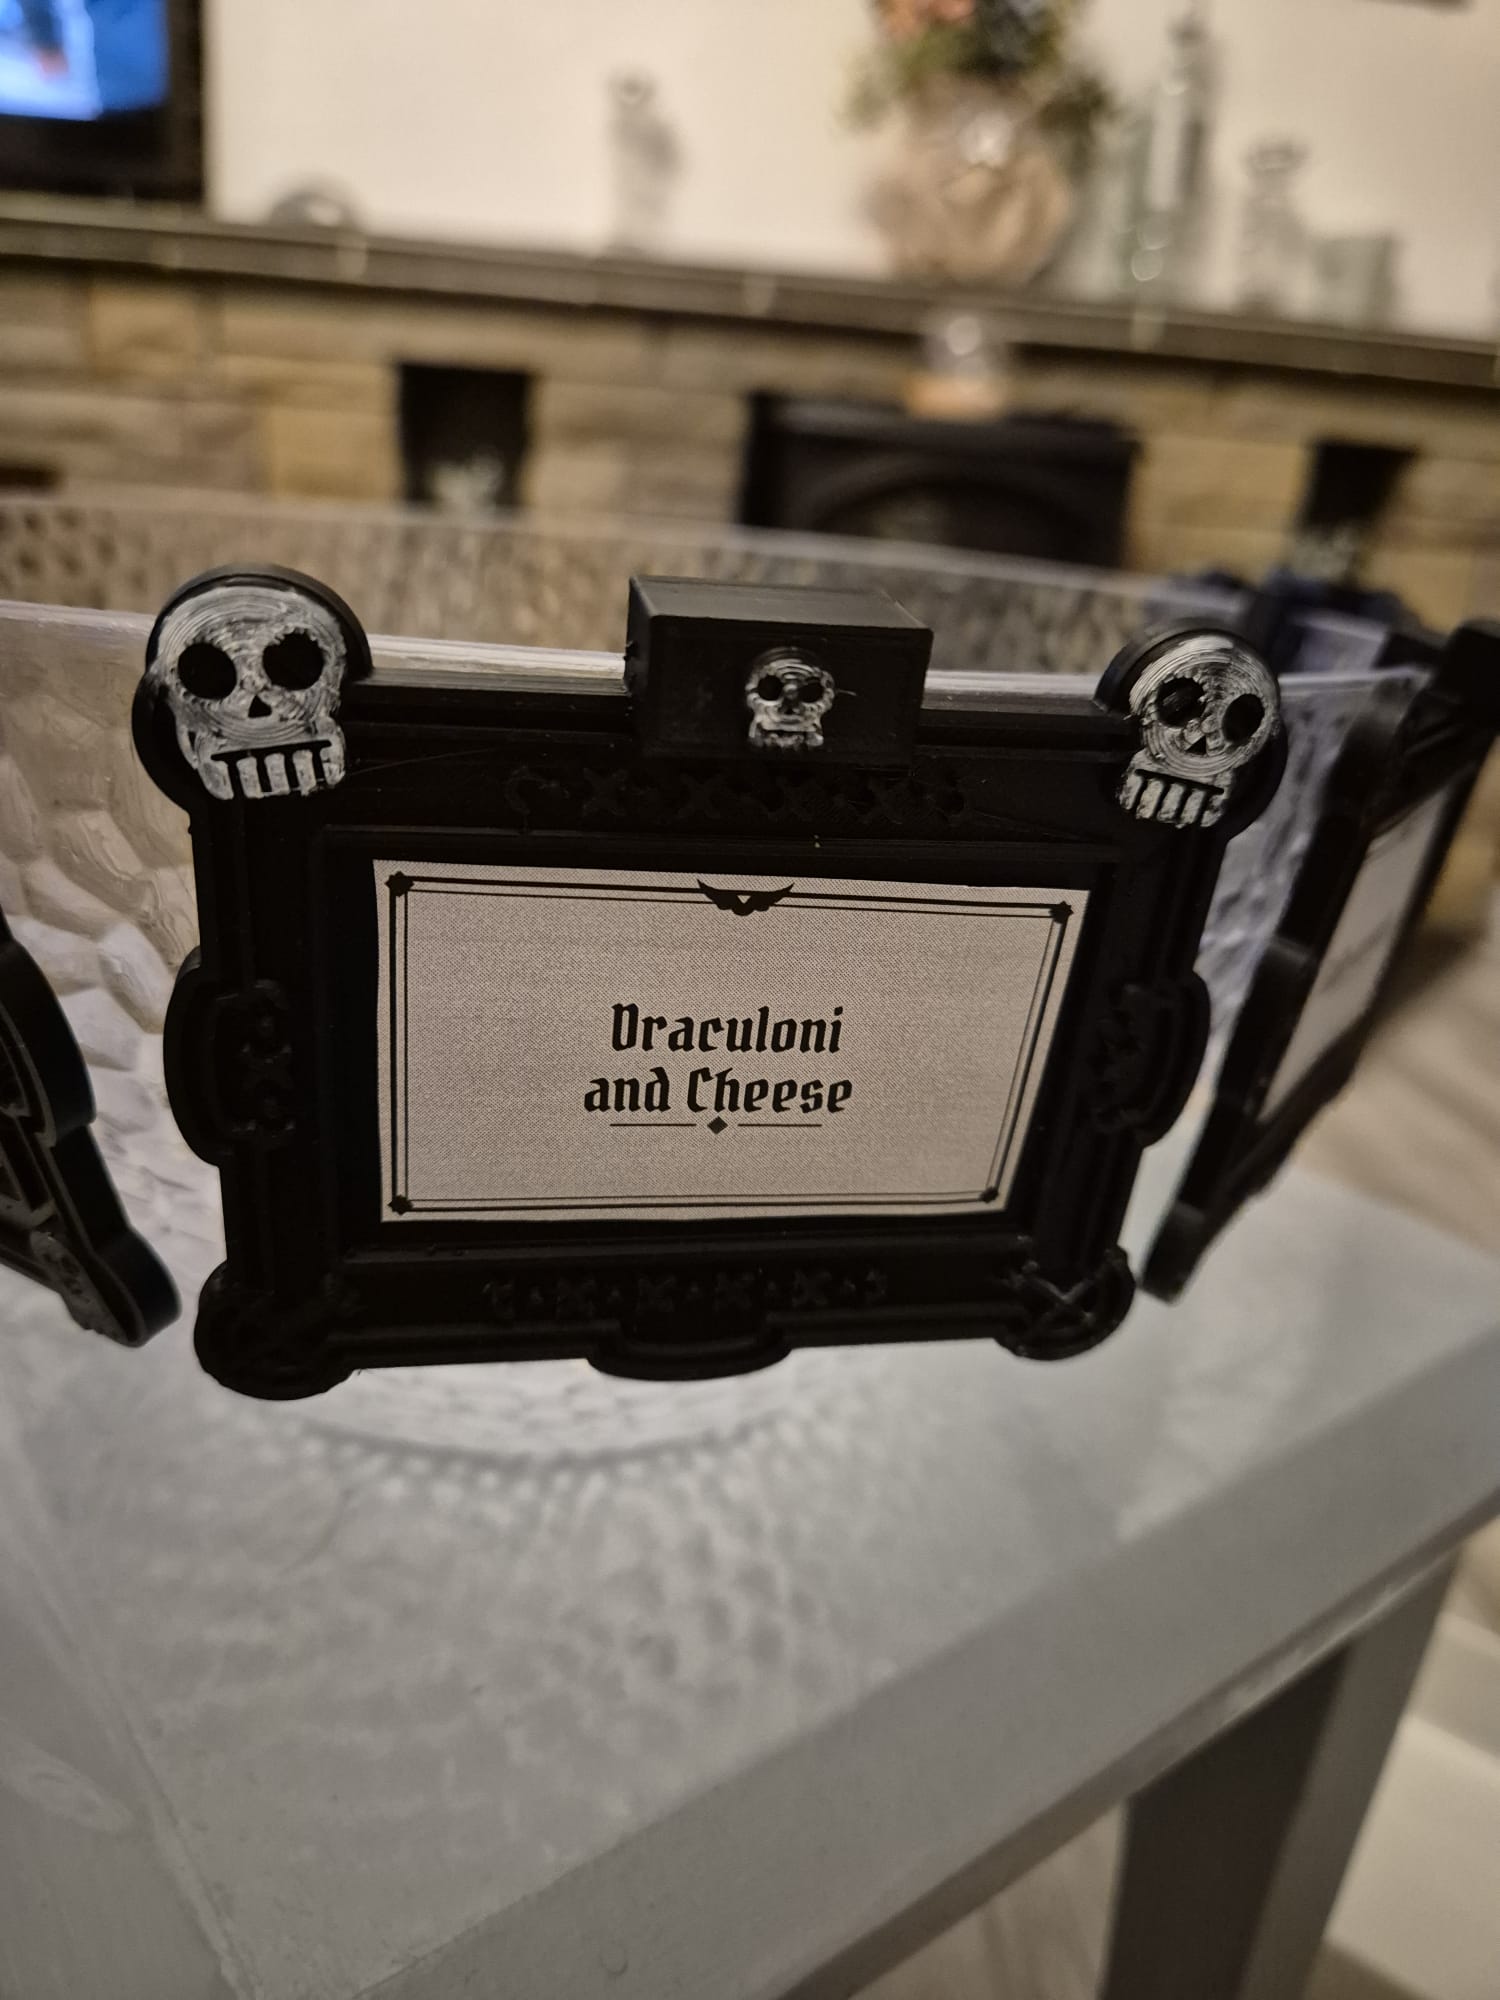
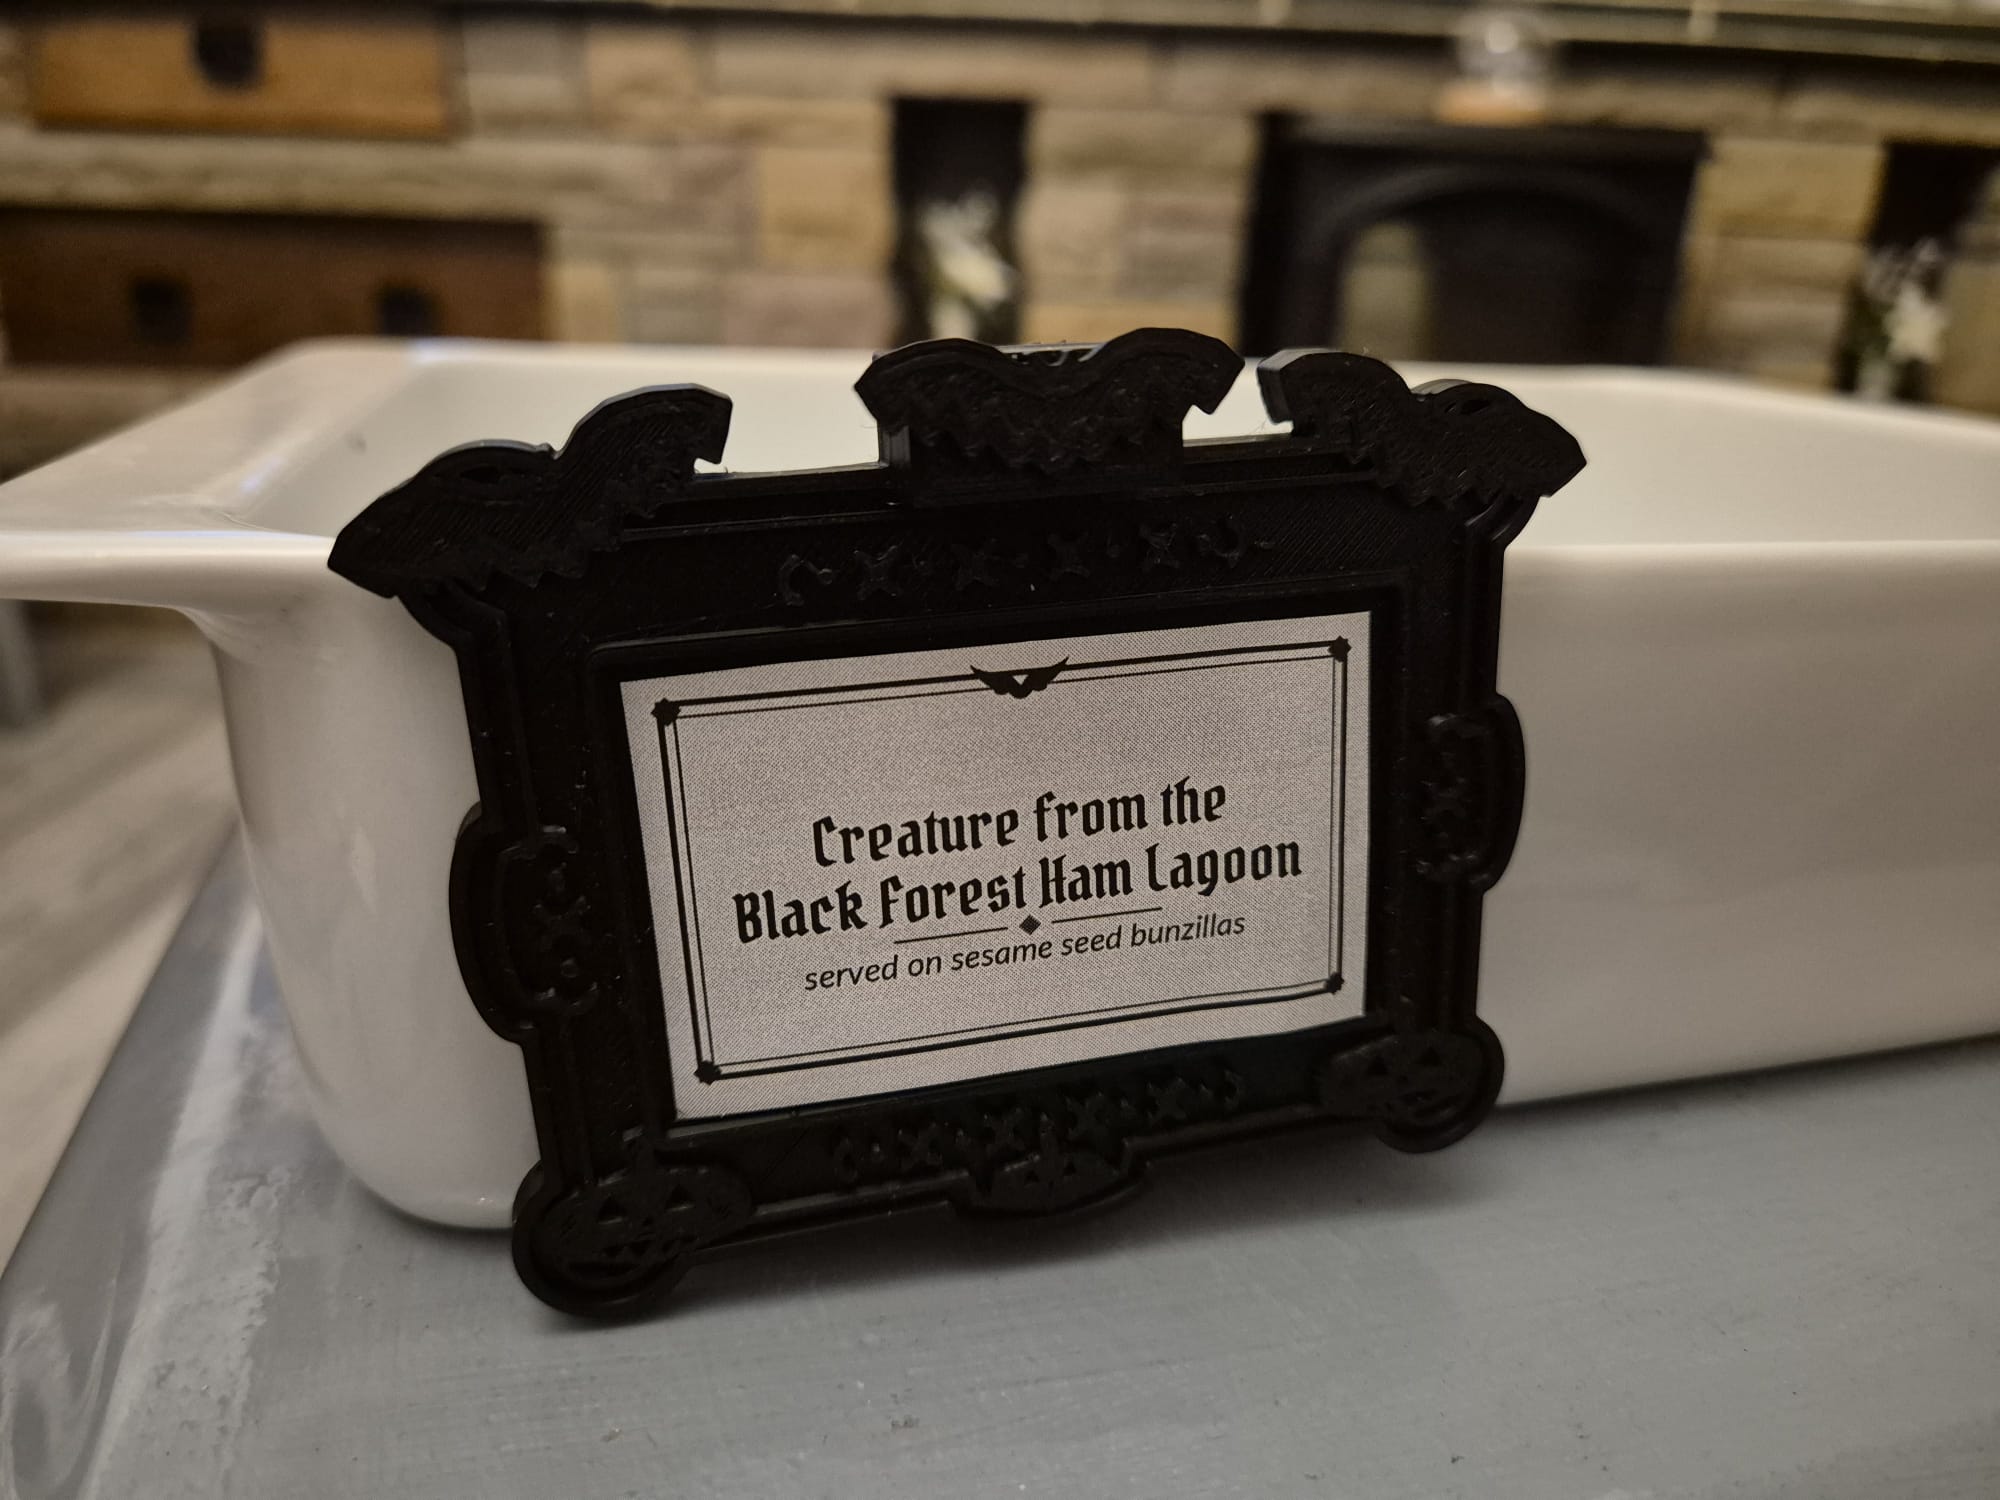
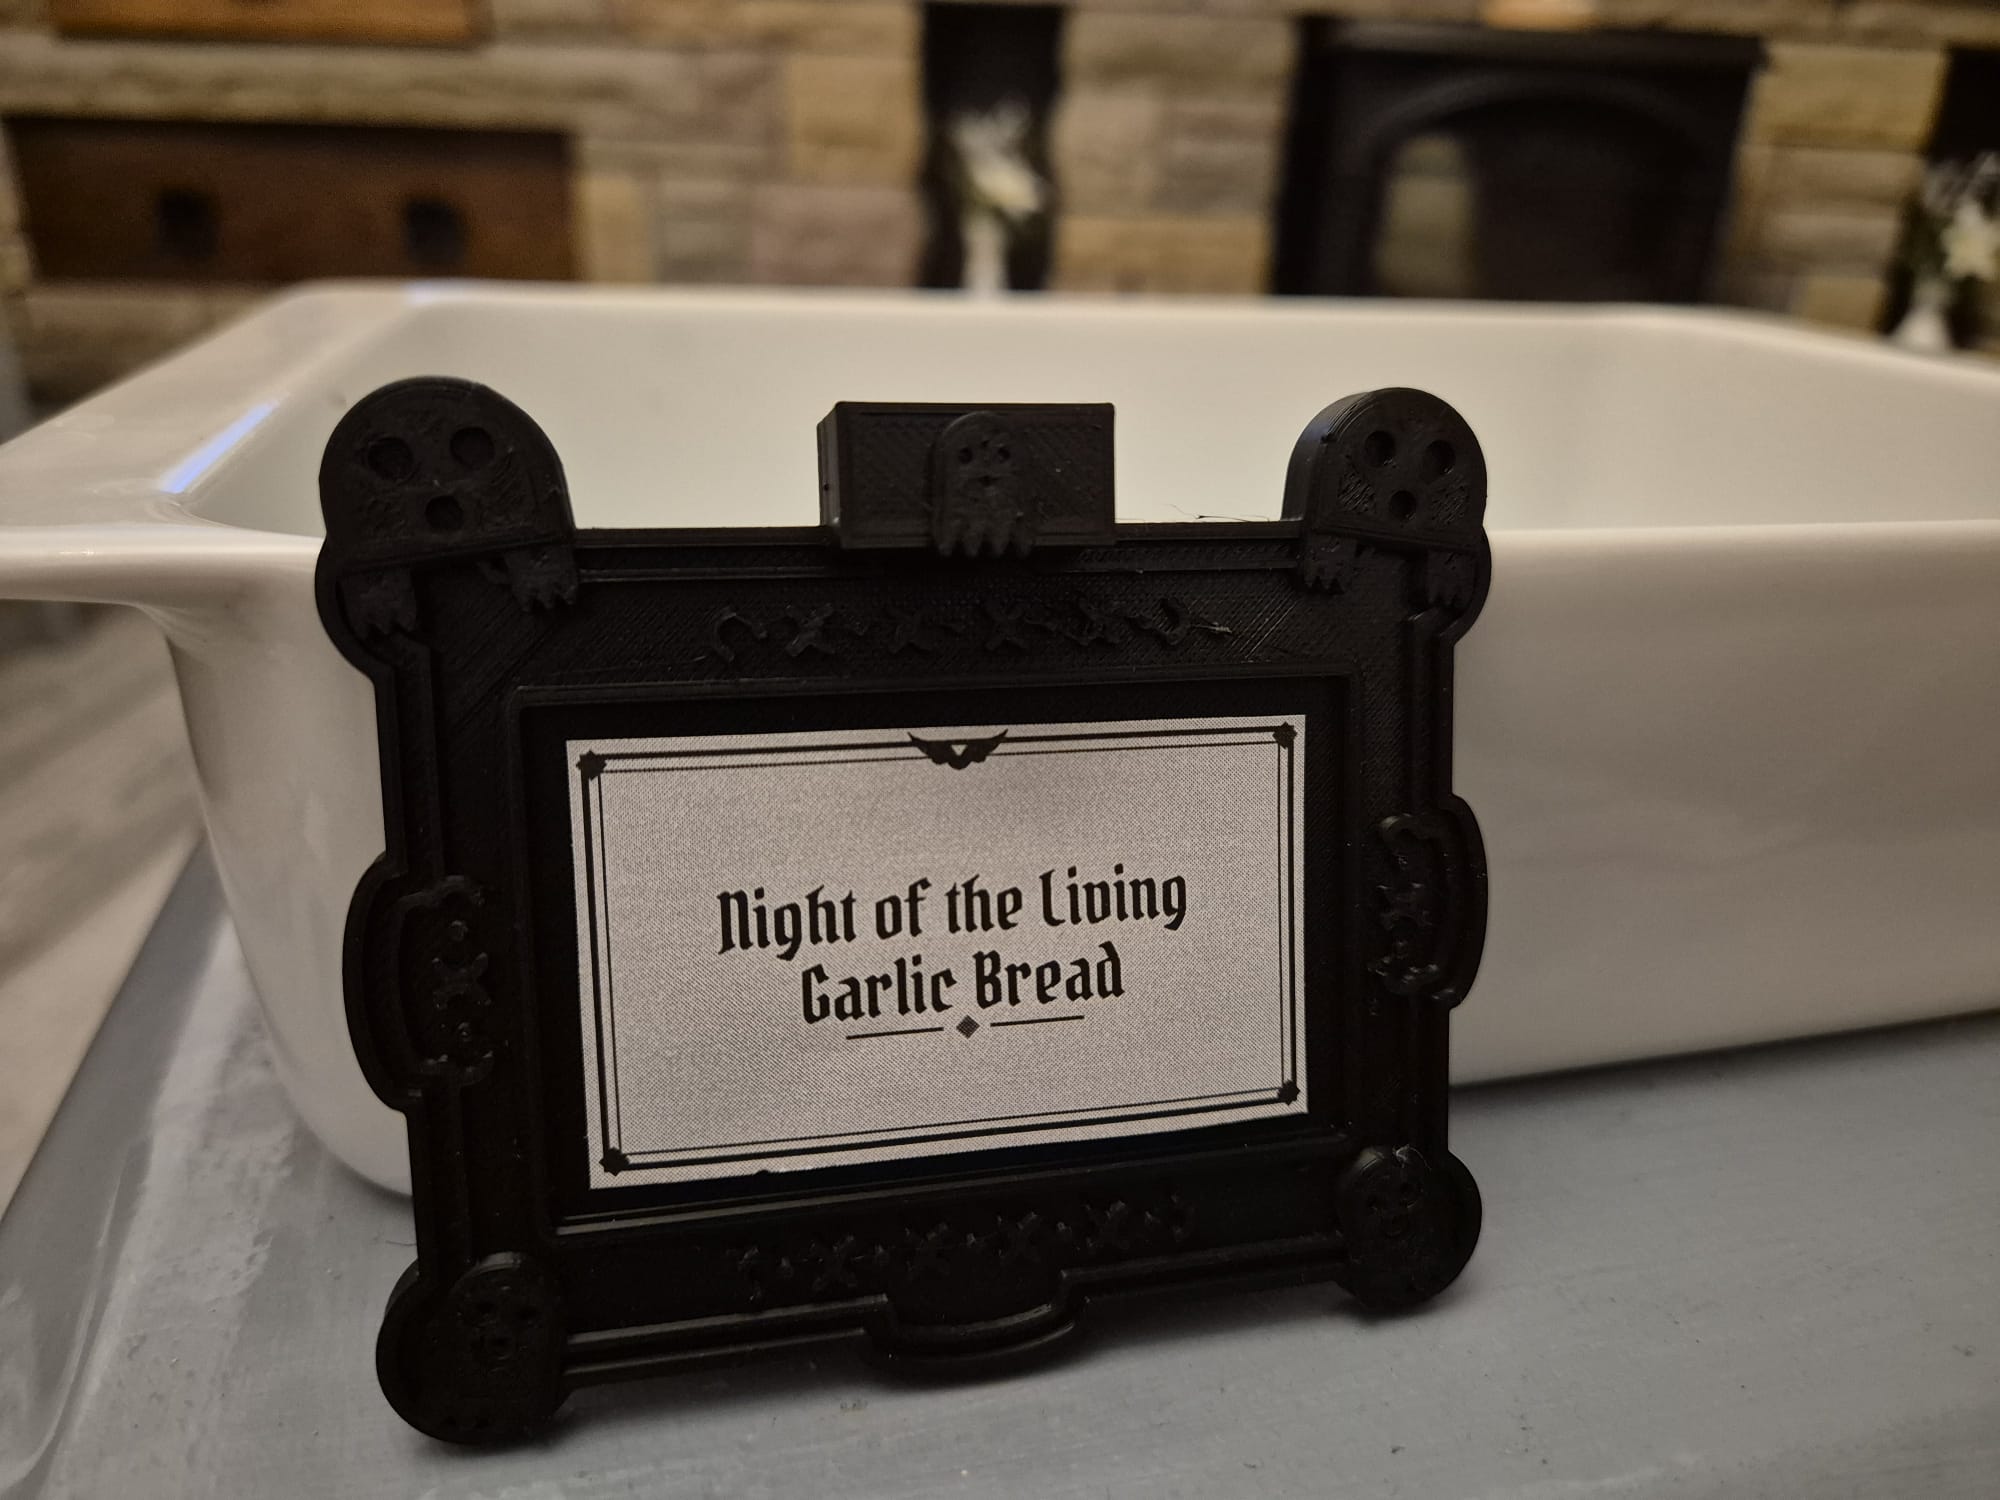
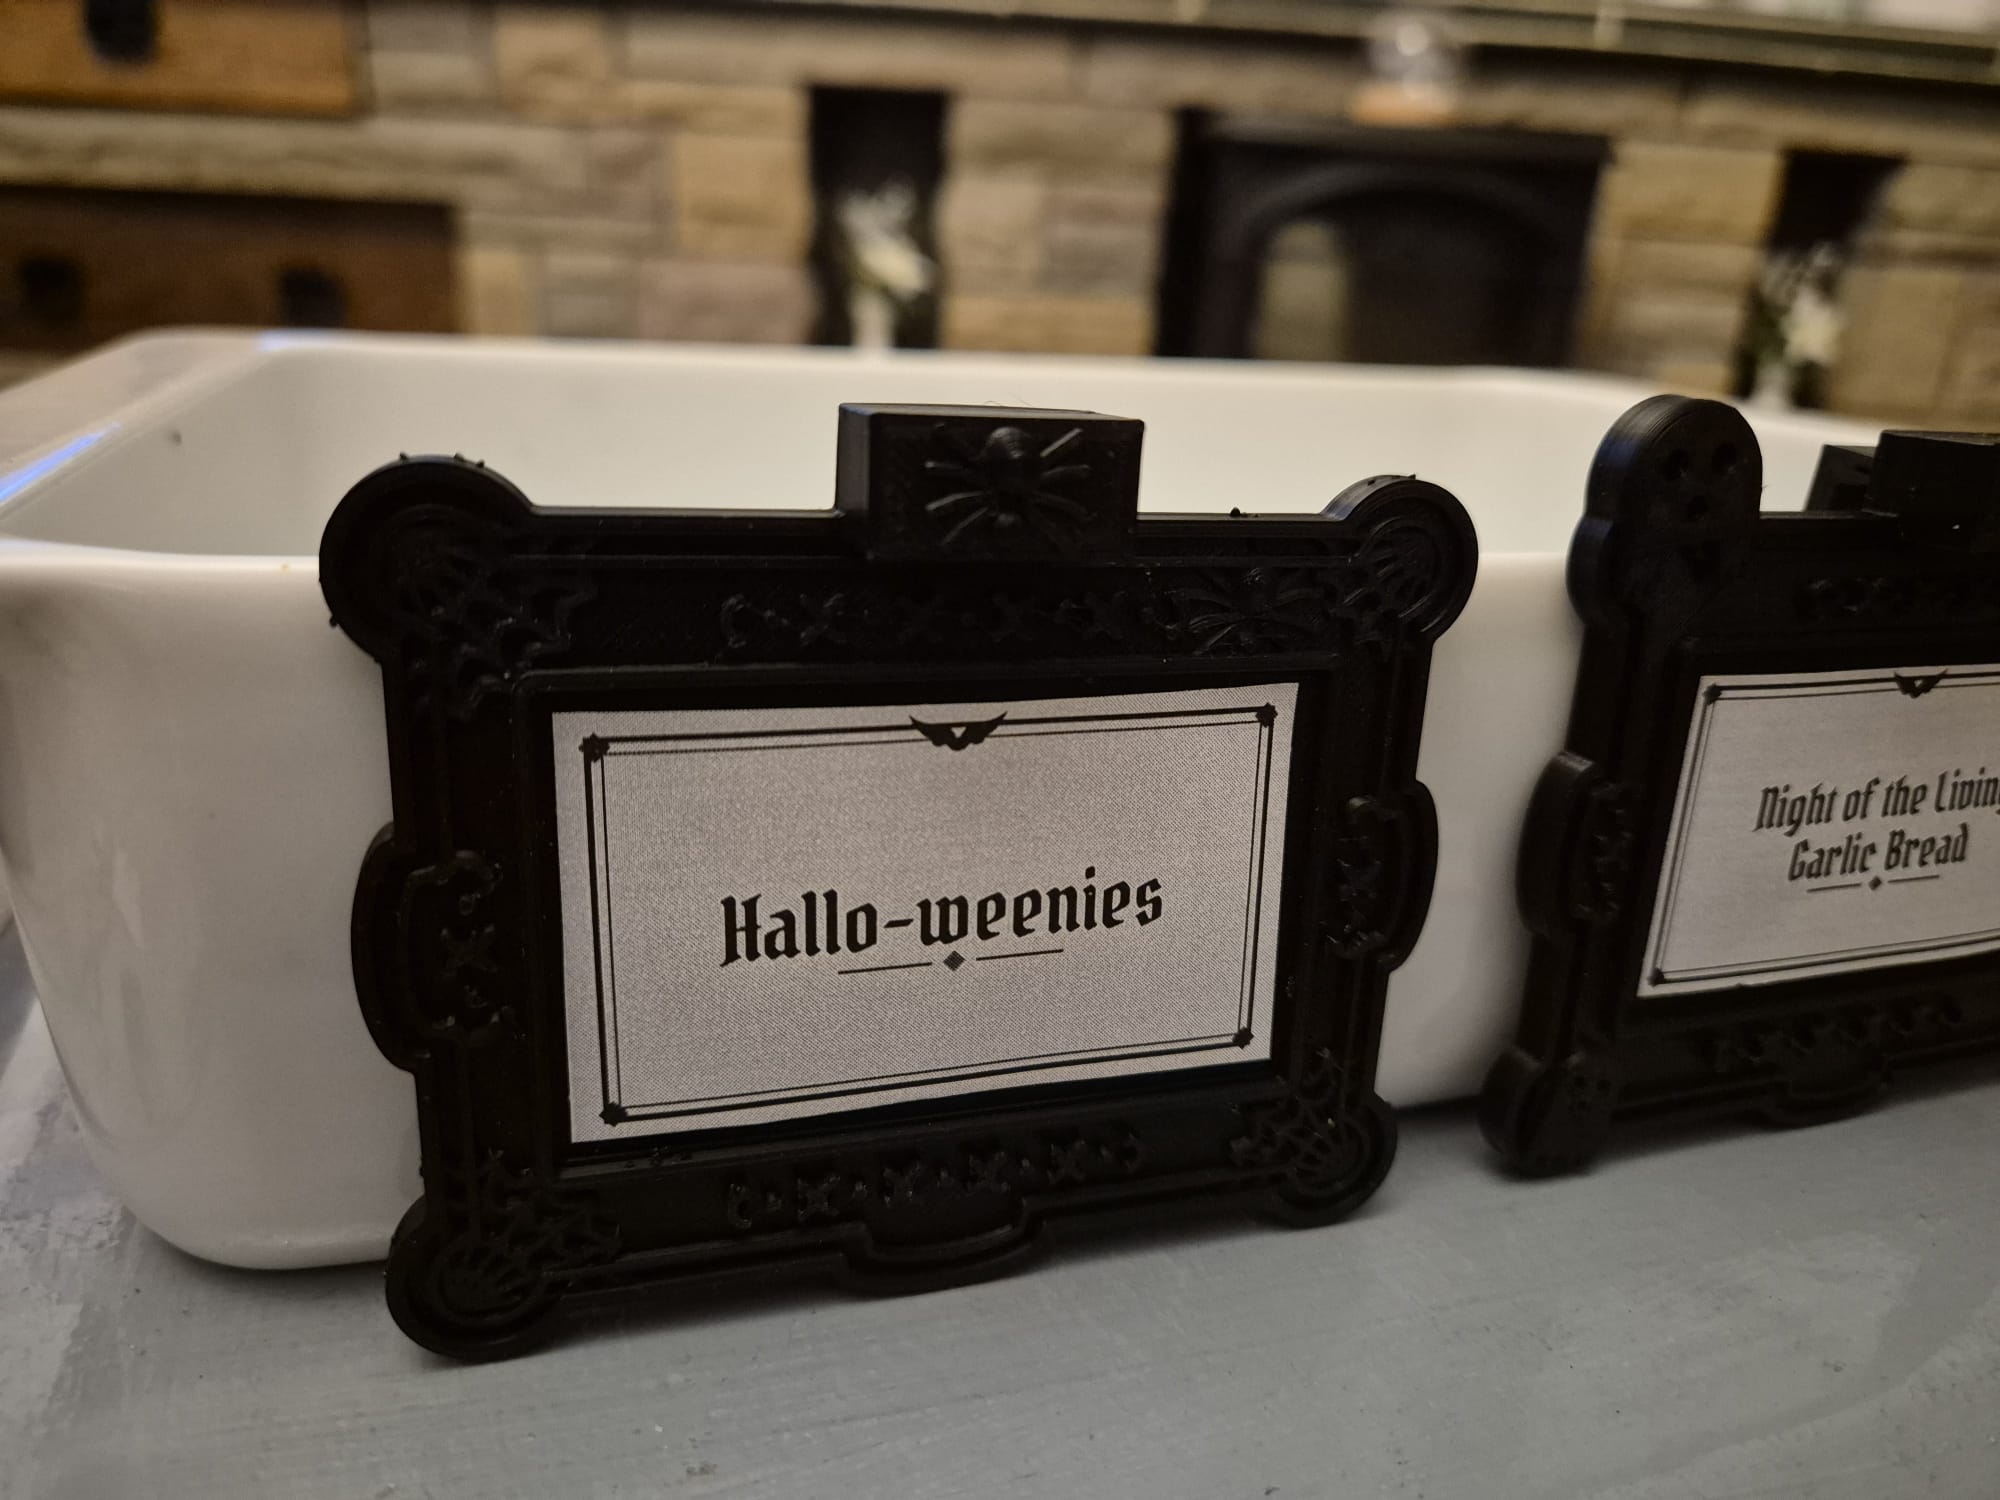
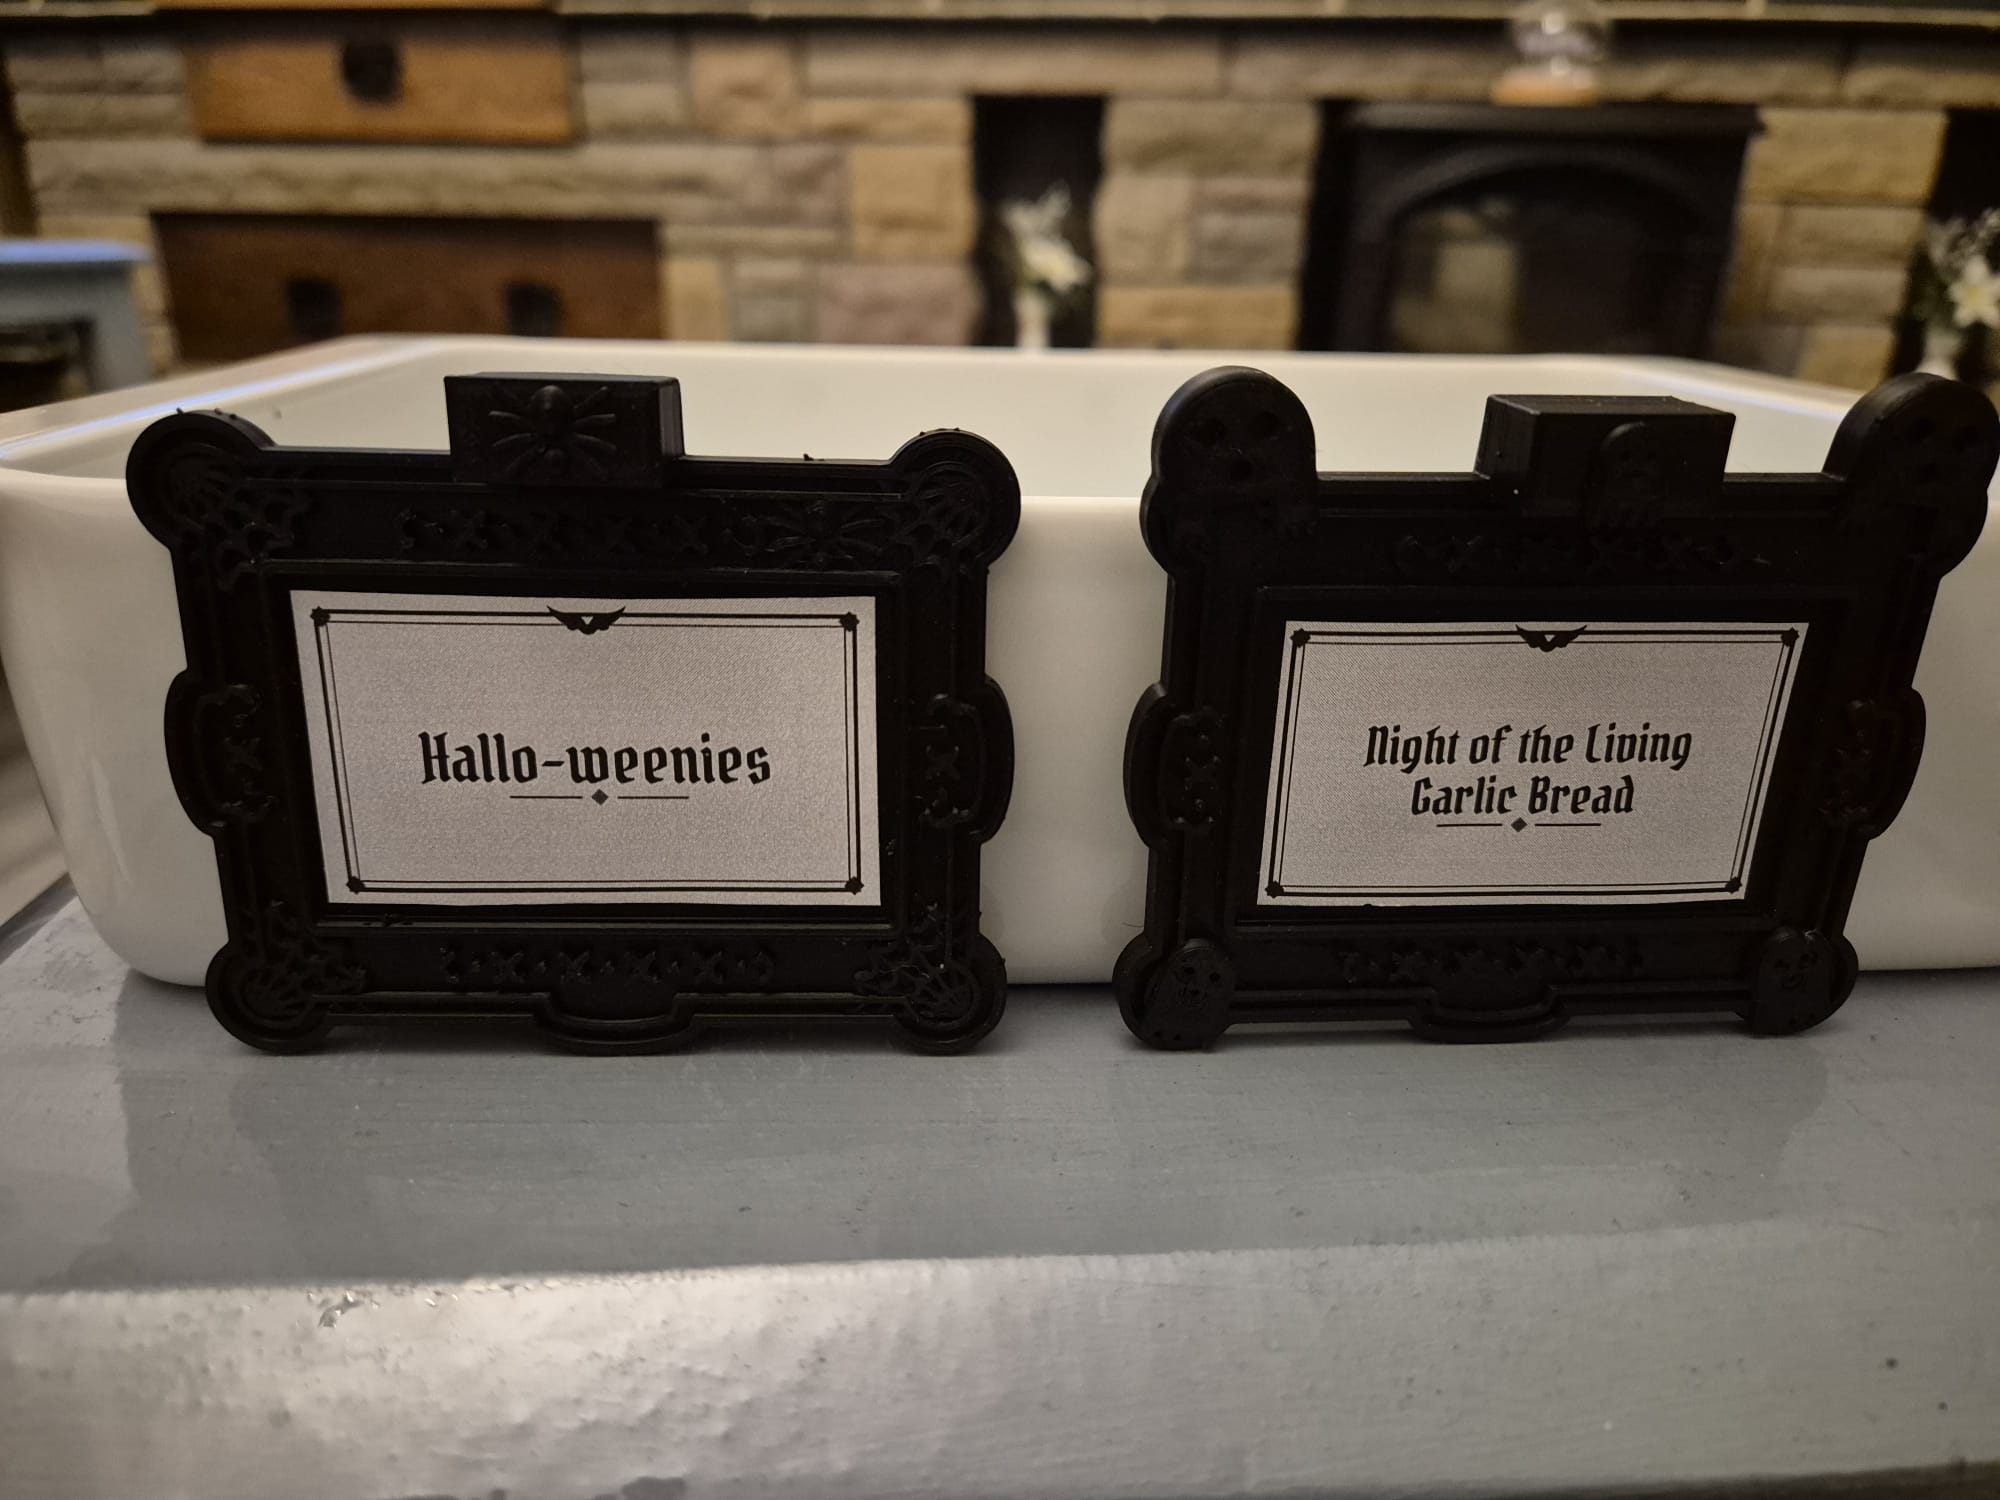
Printing
- Material: black PLA (any colour works, but black looks the most gothic)
- Supports: none. Print the frame face-up and the clip on its side.
- Fit: the clip was tuned over four rounds of test prints to click in easily and hold firmly. If your printer squashes the first layer a lot, try a test fit before printing a full set.
- Print one clip for each frame.
Dimensions
All sizes in mm.
Part A – frame
| Feature | Size |
|---|---|
| Overall plate (before ornament) | 84.0 × 64.6 |
| Overall with bats and pumpkins | ≈ 96 × 78 |
| Plate thickness | 3.0 |
| Relief height | 1.5 |
| Border, sides / top & bottom | 10 / 13 |
| Label recess (0.25 clearance per side) | 64.0 × 38.6 × 0.4 deep |
| Keystone, W × H above edge × depth | 20 × 8 × 12.5 |
| Socket, W × H × depth (blind) | 12.4 × 3.8 × 11 |
| Pawl ridge, 1.5 in from entry | 0.5 tall |
Part B – clip
| Feature | Size |
|---|---|
| Arm, L × W × T | 13 × 11.6 × 3.1 |
| Leg, H × W × T | 25 × 11.6 × 3 |
| Teeth pitch / depth | 1.8 / 0.7 (6 teeth) |
| Flex slot over the toothed tongue | 0.7 gap, tongue 1.2 |
| Tip lead-in chamfers | 0.5 |
| Inside-corner fillet | R 1.5 |
| Rim gap, min (arm bottomed) | 2 |
| Rim gap, max (3 mm engaged) | 10 |
Labels
The frame takes standard 63.5 × 38.1 mm labels, 21 to an A4 sheet: Avery L7160 address labels. Word and Avery's free online designer both have the L7160 layout built in.
If you want Raj's menu, here's a ready-to-print sheet with all four dishes on it: buffet-labels-l7160.pdf. Print it at 100% (actual size), not "fit to page", or the labels won't line up.
Need some label ideas? Steal Raj's menu, or try some of these: Mummy Dogs, Witch Finger Pretzels, Graveyard Dirt Cups, Monster Mash Potatoes, Eyeball Pasta, Bloody Punch.
Files
STL models
- Bats & Pumpkins frame buffet_tag_partA_frame.stl
- Ghosts frame buffet_tag_partA_ghosts.stl
- Spider Webs frame buffet_tag_partA_webs.stl
- Skulls frame buffet_tag_partA_skulls.stl
- Blank frame, for your own decorations buffet_tag_partA_blank.stl
- The clip, works with every frame buffet_tag_partB_clip.stl
OpenSCAD source
- Parametric model of both parts buffet_tag.scad
The frame, the bats and pumpkins decorations and the clip were modelled in OpenSCAD. Open the file and change the view variable at the top to choose what to show or export: "front", "assembly" and "section" show the design, while "export_a", "export_a_blank" and "export_b" give the print-ready frame, blank frame and clip. The clip dimensions were tuned through test prints, so change them carefully.
Blender scripts
The ghosts, spider webs and skulls frames were made by running a Blender script over the blank frame. The scripts are included, so you can make your own theme.
- Shared helper functions tag_lib.py
- Minimal example, copy this to start a new theme ornament_pass.py
- Ghosts theme ghosts_pass.py
- Spider Webs theme webs_pass.py
- Skulls theme skulls_pass.py
Run a script headless from the article folder, passing the blank frame in and the new STL out:
blender -b --python blender/ghosts_pass.py -- stl/buffet_tag_partA_blank.stl stl/buffet_tag_partA_ghosts.stl
The scripts need Blender 4.5 or later. Keep your decorations clear of the label recess and the clip socket; the coordinates are listed at the top of tag_lib.py.
Related Files
FreeCAD Related Articles
- 3D Printed Puzzle Vase for Flowers — Ideal for Lego, Crochet, and Artificial Flower Displays
- 3D Printed Toothbrush Holder
- How to Create a Custom 3D-Printed Christmas Stamp with FreeCAD
- Oversized "TOILET" Keyring for Cafes & Restaurants (The Giant Spoon)
- Oversized "TOILET" Keyring for Workshops & Garages