February 2, 2017, 10:53 pm
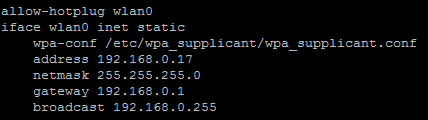
A static IP address will ensure that the Raspberry Pi will always have the same IP address. Without a static IP address the DHCP service on your router will randomly assign IP addresses from its IP range. A fixed IP address will make it easier to remotely connect to the Raspberry Pi.
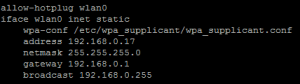
In this example, the IP address for the Raspberry Pi will be set to 192.168.0.17.
February 2, 2017, 10:40 pm
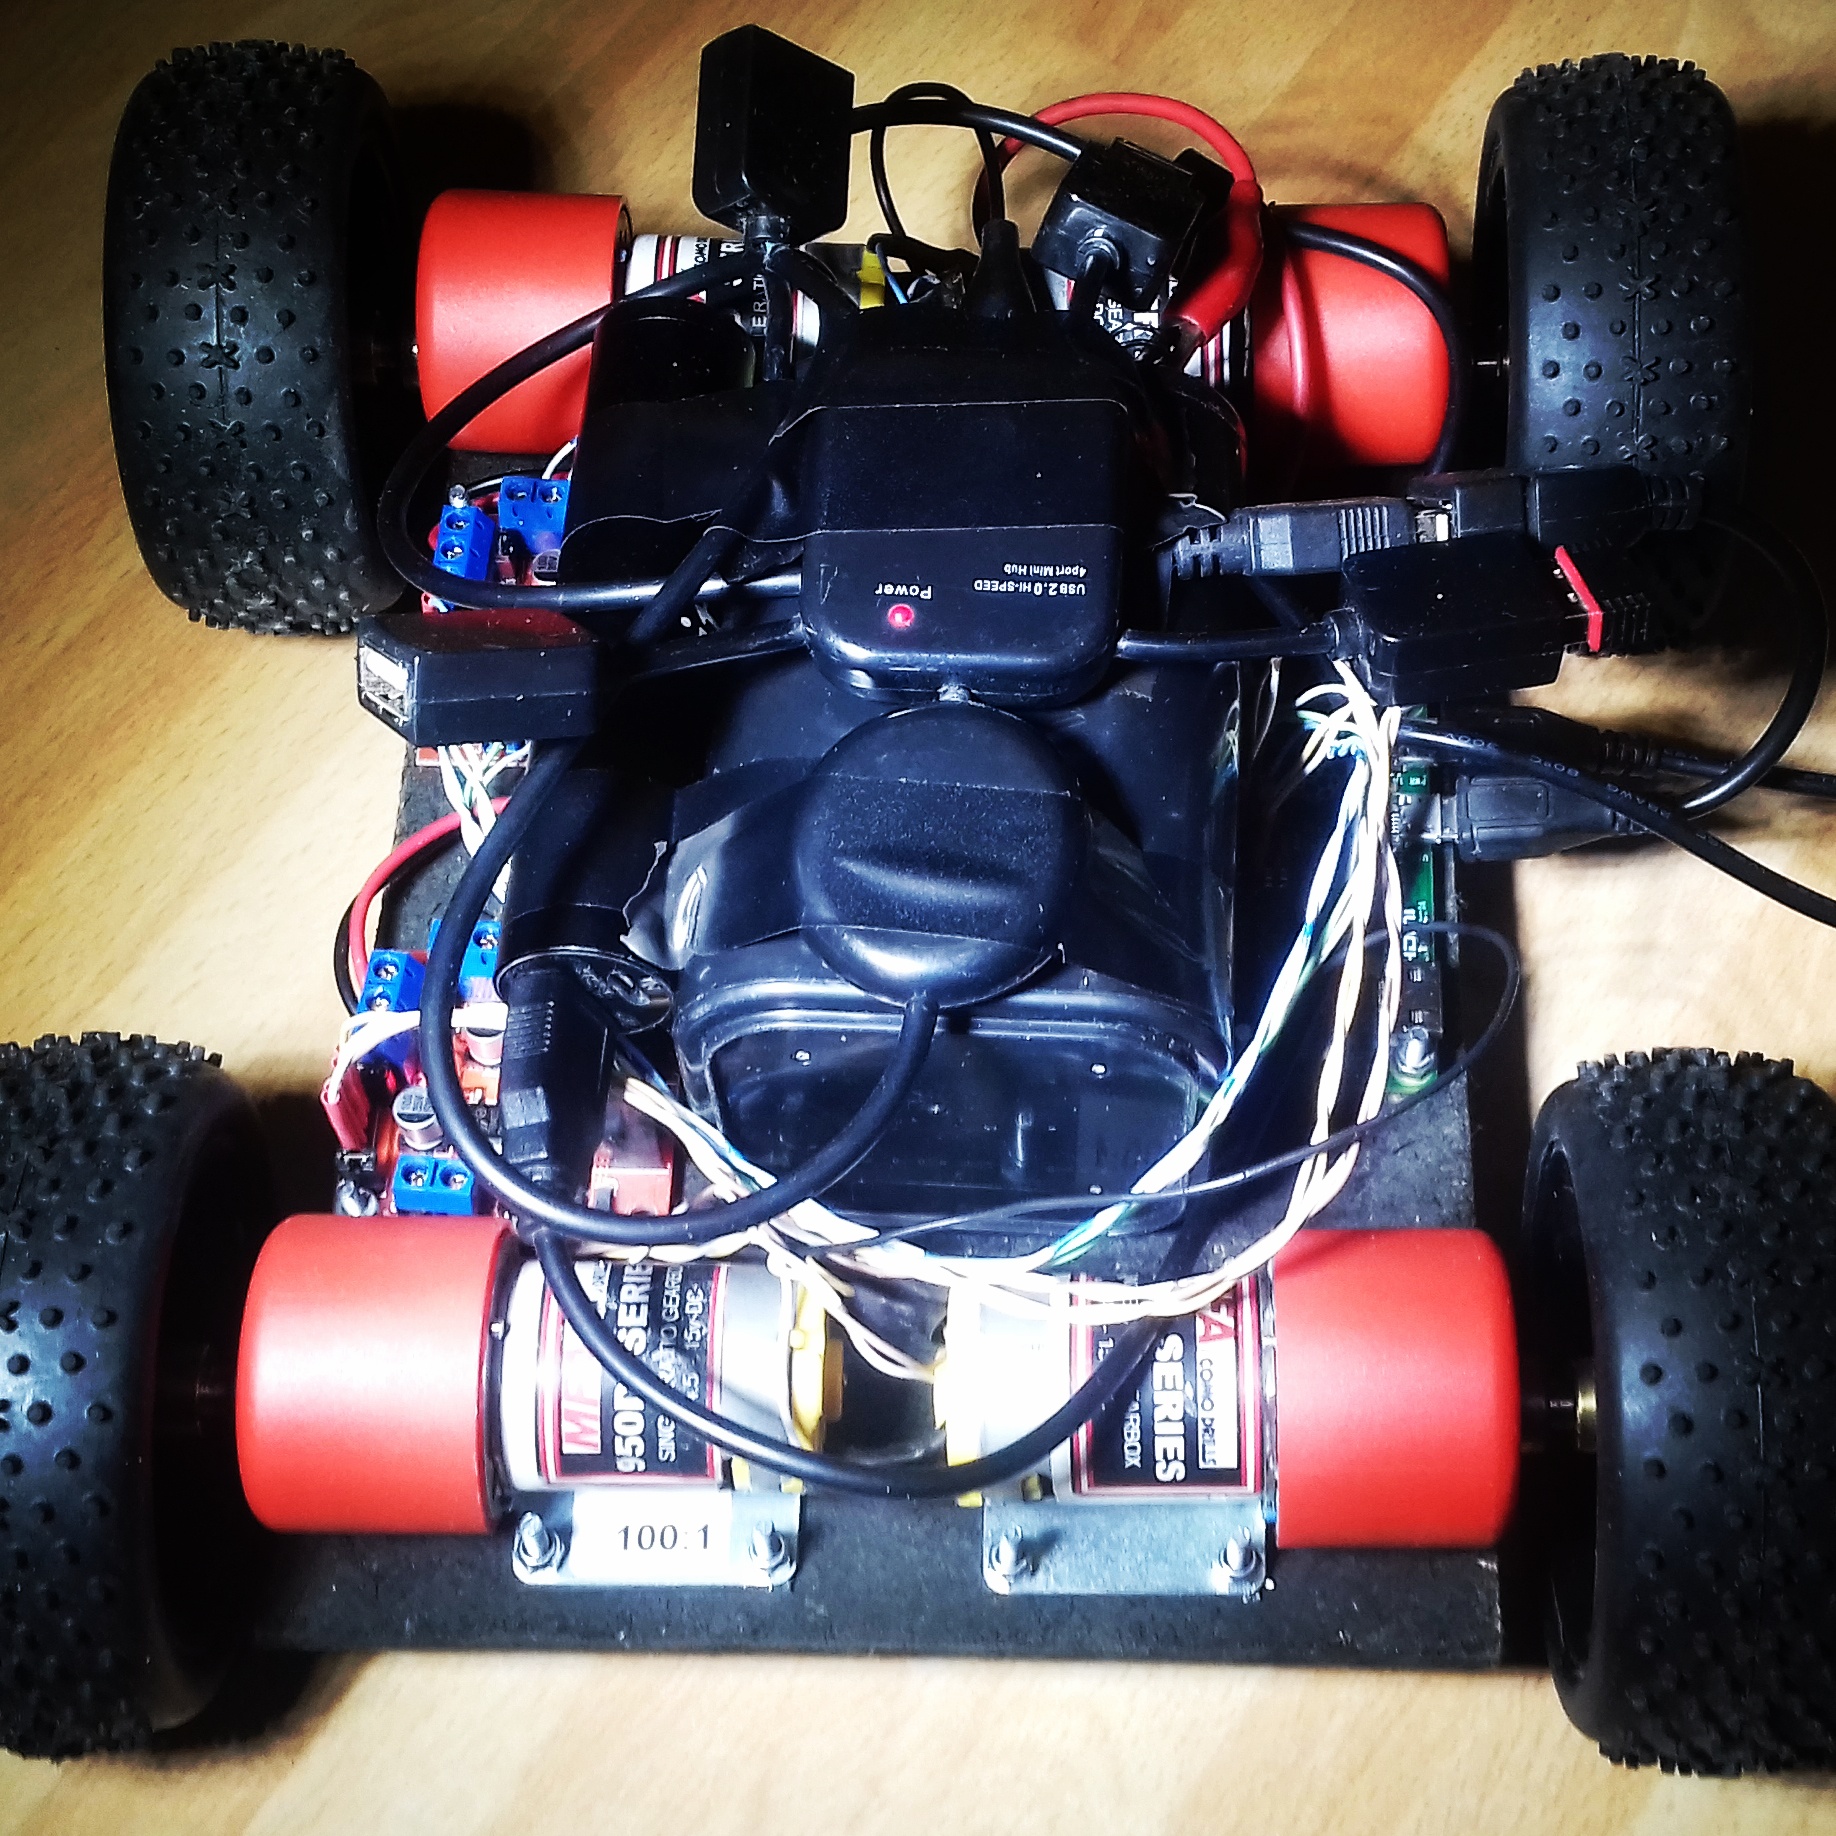
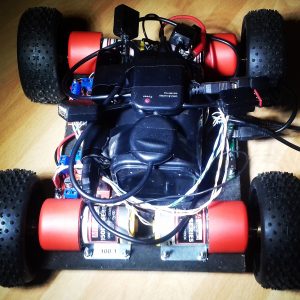
This year Team Seaford will be competing in the non-destructive robot competition Pi Wars 2017, where robot controlled by Raspberry Pi’s will compete in a range of robotics challenges.
The brains for this years robot will be the Raspberry Pi Zero that we won in Pi Wars 2015.
Please, follow our progress as we build our robot.
December 7, 2016, 9:56 pm
July 11, 2016, 12:00 pm

3D printed pound trolley key fob.
Material: PLA
Bed temperature: 65c
Nozel temperature: 180c
July 11, 2016, 11:56 am
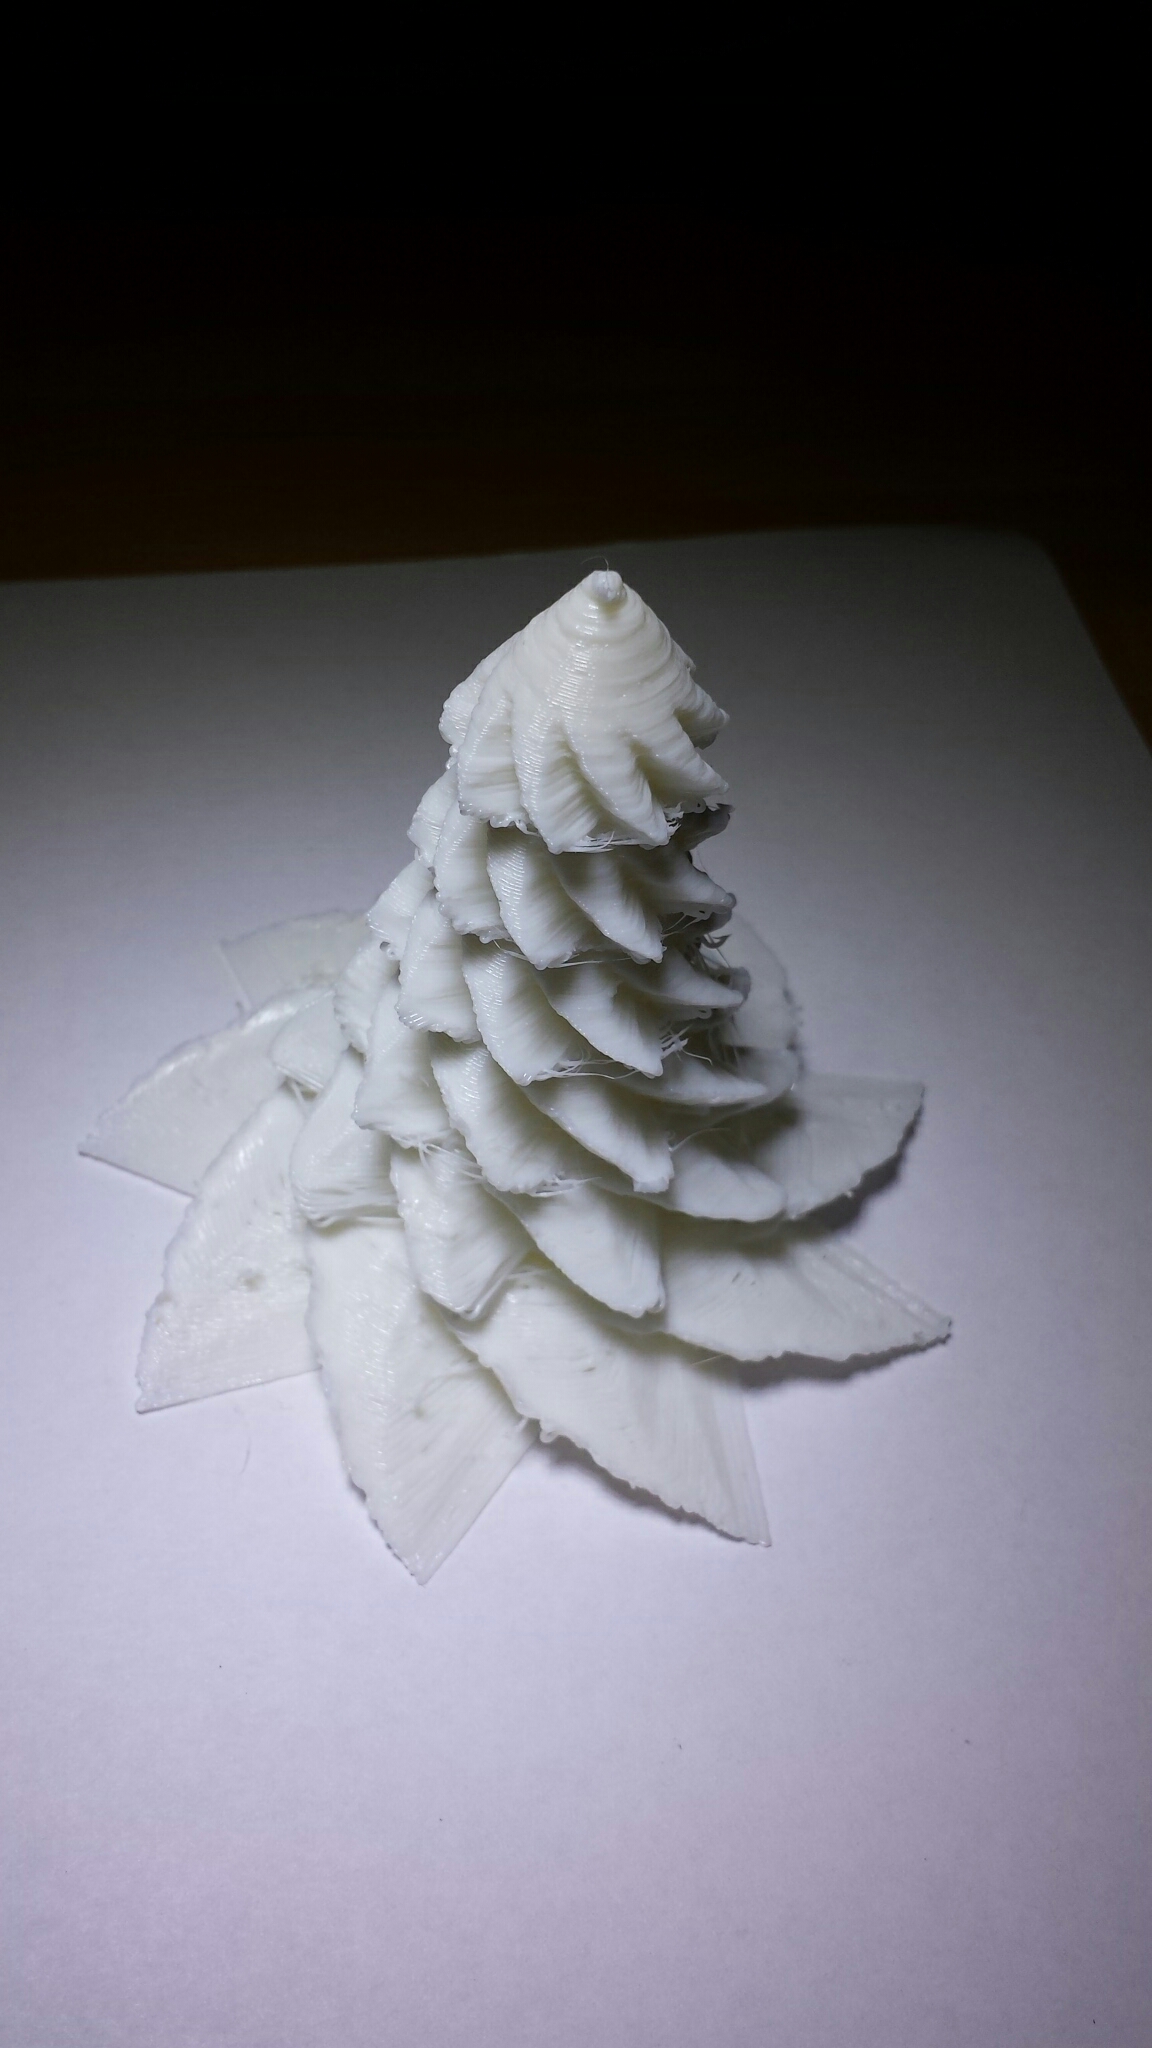
Snowy white 3D printed Christmas tree.
Material: PLA
Bed Temperature: 65c
Nozel Temperature: 185c
July 10, 2016, 4:10 pm
Finaly my Vector3 printer is ready to print. Today I have printed a bendy fish fossil.
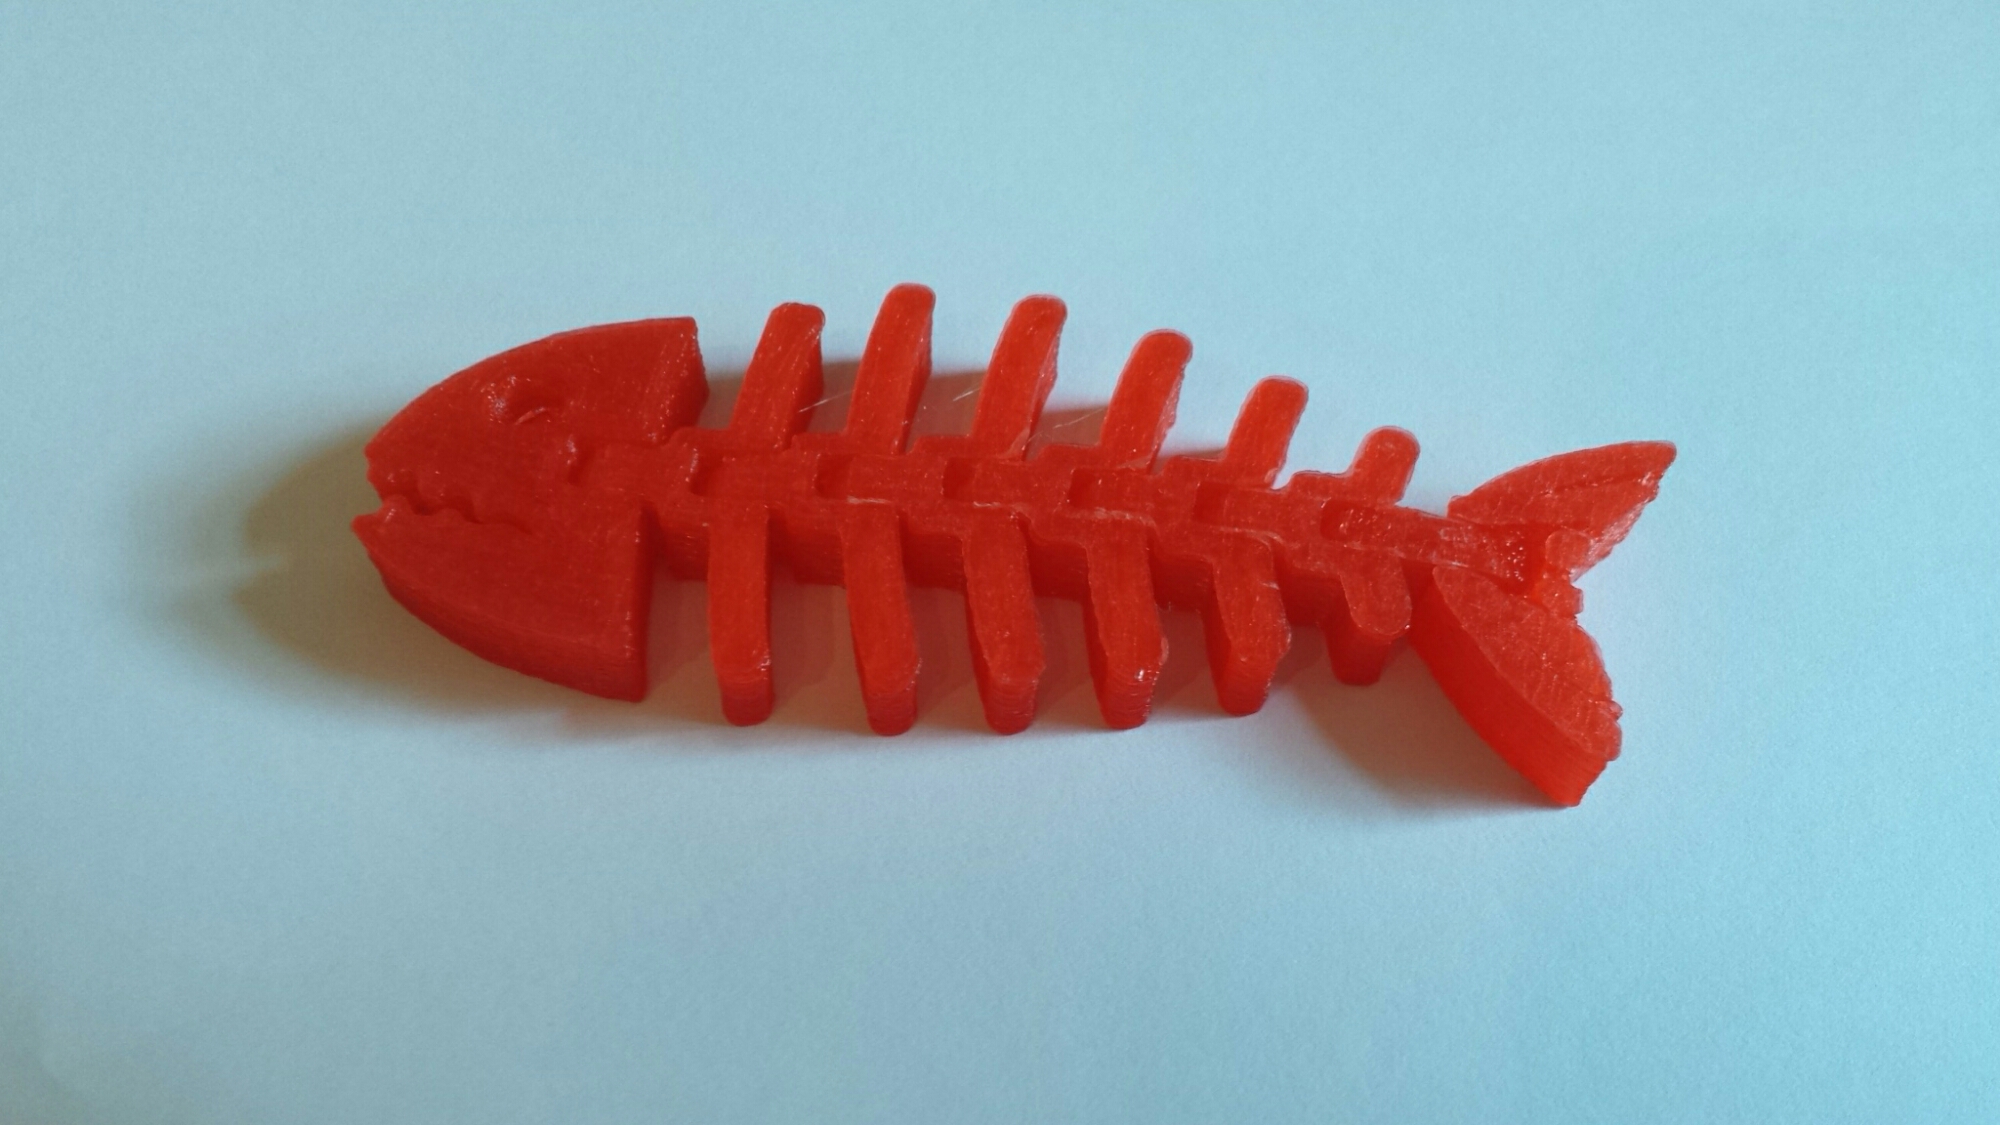

Material: PLA
Bed temperature: 65c
Nozel temperature: 180c
Print Speed: Normal
December 14, 2015, 9:45 pm
|
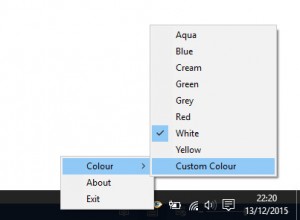
Meares-Irlen Syndrome, (also known as Scotopic Sensitivity Syndrome or Visual Stress) is the term used to describe a number of symptoms which make reading difficult and often unpleasant. The Oculus application helps people, both adults and children, by adjusting the default Window’s white background colour to a colour which is more pleasant for reading.
|
|
|
Oculus is easy to use program with eight predefined colours and a colour picker which will allow you to pick any one of 16 million colours.
Oculus is compatible with the following programs on Windows 7 and Windows 10
- MicroSoft Word
- MicroSoft Excel
- MicroSoft Outlook
- Notepad
- Wordpad
|
|
|
Related Links
http://www.colour2c.co.ukThe Dyslexia and Coloured Filter Service works in North Yorkshire Schools assessing pupils for Meares-Irlen Syndrome and prescribing coloured overlays.
|
February 23, 2015, 11:03 pm
To show a label on the Inno wizard page displaying the amount of require disk space. Add the following code section to the installer script.
[Code]

procedure InitializeWizard;

begin

  WizardForm.DiskSpaceLabel.Visible := True; // False to hide

end;
Download installer script FreeDiskSpace.iss
February 23, 2015, 10:31 pm
To check that DotNet framework is installed during an Inno install. Add the following code section to the install script.
; Check if dot net is insalled

[code]

function FrameworkIsNotInstalled: Boolean;

begin

    Result := not RegKeyExists(HKEY_LOCAL_MACHINE, 'Software\Microsoft\.NETFramework\policy\v4.0');

end;
// Install dot net with feedback
[Code]
procedure InstallFramework;
var
StatusText: string;
ResultCode: Integer;
begin
StatusText := WizardForm.StatusLabel.Caption;
WizardForm.StatusLabel.Caption := 'Installing .NET framework...';
WizardForm.ProgressGauge.Style := npbstMarquee;
try
if not Exec(ExpandConstant('{tmp}\dotNetFx40_Full_x86_x64.exe'), '/q /noreboot', '', SW_SHOW, ewWaitUntilTerminated, ResultCode) then
begin
// you can interact with the user that the installation failed
MsgBox('.NET installation failed with code: ' + IntToStr(ResultCode) + '.',
mbError, MB_OK);
end;
finally
WizardForm.StatusLabel.Caption := StatusText;
WizardForm.ProgressGauge.Style := npbstNormal;
end;
end;
In the files section add the dotnet installer file. Note the flags AfterInstall and Check that will call the functions to check if DotNet is installed and instal if required.
Source: "C:\Example\dotNetFx40_Full_x86_x64.exe"; DestDir: {tmp}; Flags: deleteafterinstall; AfterInstall: InstallFramework; Check: FrameworkIsNotInstalled
Download the installer script CheckDotNet.iss
February 23, 2015, 9:15 pm
To check if a program exists before installing with Inno add the following code section to the installer script. In this example we will be testing for the file “c:\Example\Test.exe”. If the test.exe file exist a message box showing “Program Already Exists” will be displayed and the installer will terminate.
[Code]

function IsMyProgramInstalled: boolean;

begin

  result := FileExists('C:\Example\Test.exe');

end;
function InitializeSetup: boolean;
begin
result := not IsMyProgramInstalled;
if not result then
MsgBox('Program Already Exists', mbError, MB_OK);
end;
Download the installer script IsMyProgramInstalled.iss