Containerize An Inno Installed Application
Introduction
In this article, we are going to create a Docker Image from an Inno Installer. The installer will install a .net 4.8 framework console application into the docker image.
Typically, when building docker images you should try to build the image from the source code but in the real world this is not always possible and in this article, we will assume that you do not have access to the source code for the installer or the console application that this being installed.
We will be using an installer called mysetup.exe, which installs an application called HelloWorldConsole.exe to the folder c:\program files (x86)\My Program\.
Containerize Procedure
In this procedure, we are going to create a Docker Image that will execute the installer and configure the container to run the application HelloWorldConsole.exe on startup.
- In the same folder as the installer mysetup.exe create a text file called Dockerfile.
- Using a text editor add the following code to the Dockerfile.
FROM mcr.microsoft.com/dotnet/framework/runtime:4.8WORKDIR /appCOPY mysetup.exe
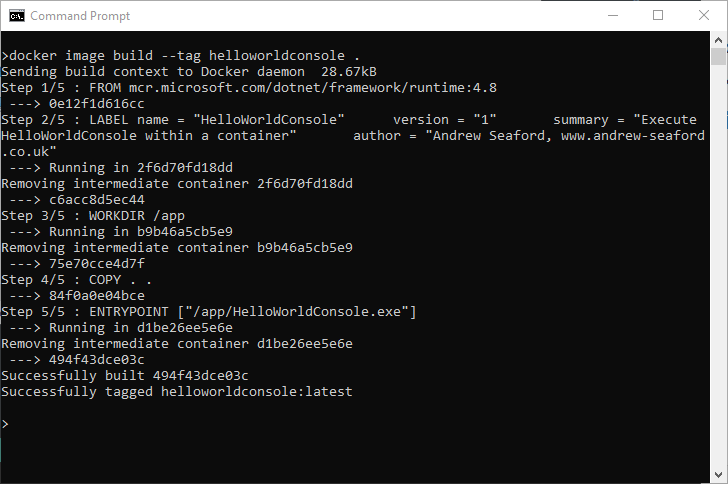
RUN mysetup.exe /VERYSILENTENTRYPOINT ["/program files (x86)/My Program/HelloWorldConsole.exe"] - Open the command prompt and navigate to the folder containing the Dockerfile and execute the command to create the docker image. The command will create a new docker image called installhelloworldconsole.
docker image build --tag installhelloworldconsole .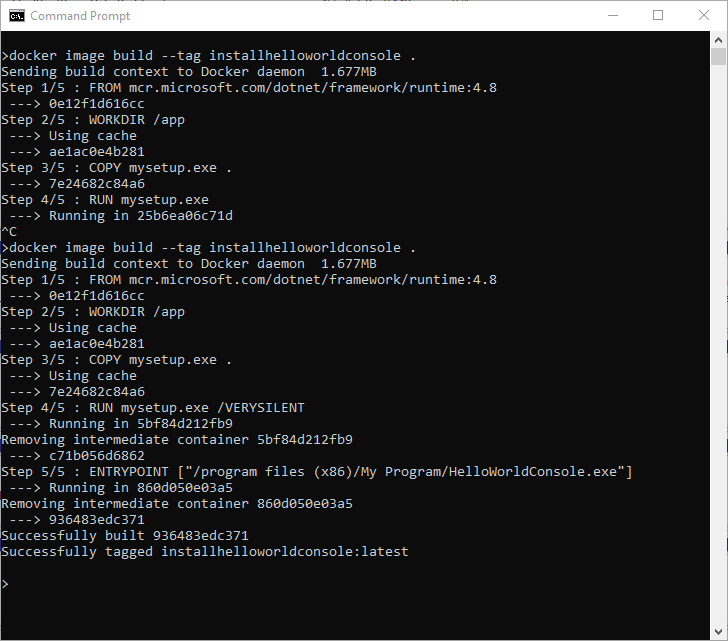
- To create a container using the image run the command docker run. This command will create a container using the image created in the previous step and call the container hello2.
docker run --name hello2 installhelloworldconsole - After the container has booted, the container will execute the program c:\program files (x86)\My Program\HelloWorldConsole.exe

- You can confirm the program has been executed by checking the docker logs using the command docker logs and the name of the container.
docker logs hello2
Summary
In this article, we create a docker container using a pre-existing installer.