Archive for the ‘Programming’ Category.
February 18, 2015, 1:54 am
This example shows how to automattically update the version numbers for you Inno installer based on the version number of the target exe program.
In this example the installer will be installing a program called notepad.exe.
At the top of the script. The version number from the target exe is stored in the variable MyAppVersion
#define MyAppVersion GetFileVersion("notepad.exe")
In the Setup section the MyAppVersion is used to set the installer version number, product version number and used as part of the installer name.
AppVersion={#MyAppVersion}

AppVerName={#MyAppName} {#MyAppVersion}

OutputBaseFilename=Setup{#MyAppName}{#MyAppVersion}

VersionInfoVersion={#MyAppVersion}
Download the full installer code AutoGetVersionNumber.iss
February 12, 2015, 10:32 pm
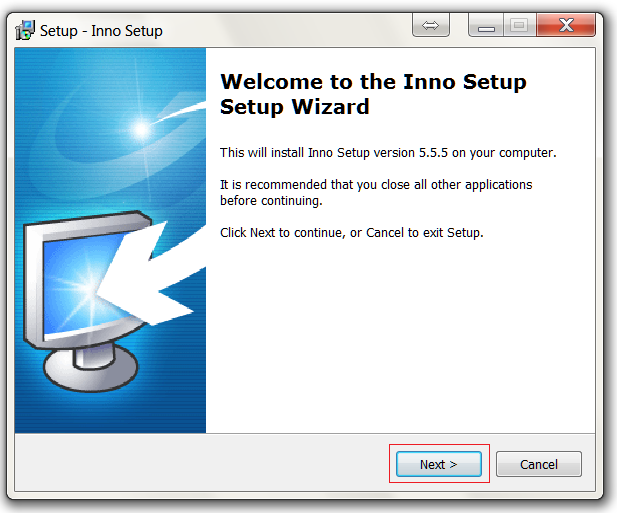
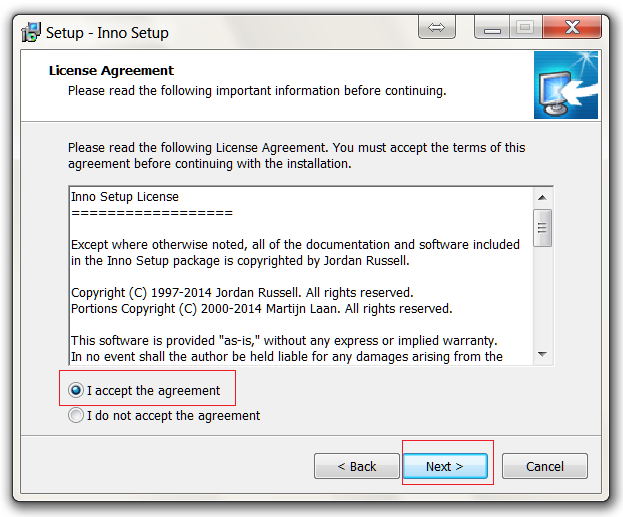
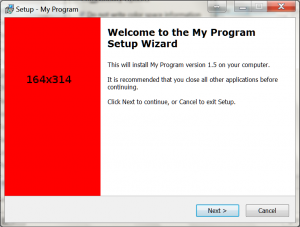
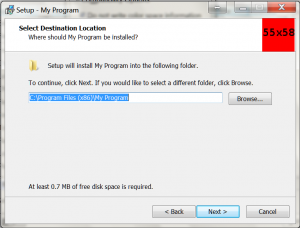
To customise the look of your inno installer, you can modify the images displayed on the install pages. The large image on the left hand side of the instal pages is set using the parameter WizardImageFile. The small image shown on the top right of the install pages is set using the parameter WizardSmallImageFile.
In this example I have replaced the standard images with a large red image. Hopefully you will make an image that is more appealing.
The WizardImageFile and WizardSmallImageFile parameters should be defined in the [setup] section of the inno install script. In this example the images are in the folder c:\InstallFiles and are called Small.bmp and Large.bmp.
[Setup]

WizardSmallImageFile="C:\InstallFiles\Small.bmp"

WizardImageFile="c:\InstallFiles\Large.bmp"
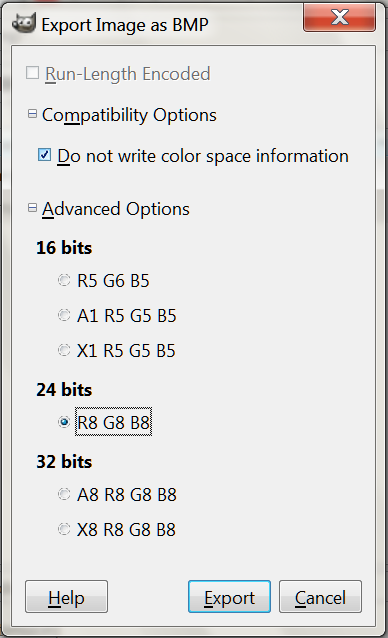
The files must be saved as 256bit bmp files. I created my examples files using GIMP. To save the images using GIMP.
- Click File > Export As…
- Select a location for the file, enter a file name and then click export
- Expand the ‘Compatibility Options’ and check ‘Do not write color space information’. Expand the ‘Advanced Options’ and select 24 bits R8 G8 B8 and then click the export button

The small image should be 55×58 pixels. The large image should be 164×314 pixels.
Download full Inno script CustomImage.iss
Download images Large.bmp Small.bmp
January 7, 2015, 1:02 pm
            // Configure open file dialog box
            Microsoft.Win32.OpenFileDialog dlg = new Microsoft.Win32.OpenFileDialog();
            dlg.Title = "Select File"; // dialog title
            dlg.FileName = ""; // Default file name
            dlg.DefaultExt = ".csv"; // Default file extension
            dlg.Filter = "CSV File (.csv)|*.csv|All Files (*.*)|*.*"; // Filter files by extension

            // Show the dialog and process result
            if (dlg.ShowDialog() == true)
            {
                string filename = dlg.FileName;
            }
January 5, 2015, 10:01 pm
July 25, 2014, 4:17 pm
Test if two values are almost equal.
///
/// Test if two doubles are approximately equal
///
/// Test variable one
/// Test variable two
/// epsilon a measure of equality
/// boolean true = values are approximately equal, false = values are not equal
public static Boolean almostEqual(double a, double b, double eps)
{
    return Math.Abs(a - b) < eps;
}
Example using the function.
double a = 1.234;
double b = 1.235;
double eps = 0.01;
Console.WriteLine("equal = " + almostEqual(a, b, eps).ToString());
July 22, 2014, 9:47 pm
A simple SQL example of using the To_Date function to format a date.
INSERT INTO EXAMPLETBL (EXAMPLEID, EXAMPLEDATE) VALUES ('5', TO_DATE('2014-05-08 08:06:24', 'YYYY-MM-DD HH24:MI:SS'))
July 22, 2014, 9:18 pm
This simple batch script creates a new folder based on the date and time and then executes a oracle database dump.
REM Backup oracle database

@echo Starting database backup

REM get the current datestamp in the format year-month-day-hour-minute
SET DATESTAMP=%date:~6,4%-%date:~3,2%-%date:~0,2%-%time:~0,2%-%time:~3,2%

REM Create a new directory
md "c:\backup\%DATESTAMP%"

REM backup database
REM Dont forget to change username and password
exp username/password@xe FILE="c:\backup\%DATESTAMP%\databasename.dmp"

@echo Finished backing up database to c:\backup\%DATESTAMP%
August 30, 2013, 6:47 pm
/** split a name into the first name and last name
 * @param input The name eg 'John Doe'
 * @return Array containing firstname and lastname eg array('firstname'=>'John', 'lastname'=>'Doe');
 */
function splitname($input)
{
   $output = array("firstname"=>"", "lastname"=>"");
   $space = strpos($input, " ");
   if ($space !== false)
   {
      $output['firstname'] = substr($input, 0, $space);
      $output['lastname'] = substr($input, $space, strlen($input));
   }
   else
   {
      $output['lastname'] = $input;
   }
   return $output;
}
August 29, 2013, 7:17 pm
Convert a url data in to Name Value Pairs array.
/** Convert a url data in to Name Value Pairs array
 * @param url The url and the data string
 * @return array of named value pairs
 */
function urlToNvp($url)
{
   $output = array();

   $questionmark = strpos($url, '?');
   if ($questionmark !== false)
   {
      $url = substr($url, $questionmark+1, strlen($url));
   }

   foreach(explode('&', $url) as $data)
   {
      $value = explode('=', $data);
      $output[$value[0]] = $value[1];
   }

   return $output;
}
Here are three examples of using this function
print_r(urlToNvp("www.example.co.uk?p1=one&p2=two"));
print_r(urlToNvp("p1=one&p2=two"));
print_r(urlToNvp("www.example.co.uk?p1=one"));
The result
Array ( [p1] => one [p2] => two )
Array ( [p1] => one [p2] => two )
Array ( [p1] => one )
August 29, 2013, 11:04 am
In this example I will create a C++ dll that with contain the OpenCV image processing code. I then will create a C# WPF application, within this application i will then include the dll and using the image processing function.
-
Install OpenCV http://docs.opencv.org/doc/tutorials/introduction/windows_install/windows_install.html#windows-installation
- Create a C++ Win32 console Application, in this example it will be called ImageProcessingAgain
- Click Next. Select Application type dll. Then click finish.
- Click Property Manager, right click on debug, then select ‘Add Existing Property Sheet’. If you dont have a property sheet follow the following tutorial for creating The Local Method http://docs.opencv.org/doc/tutorials/introduction/windows_visual_studio_Opencv/windows_visual_studio_Opencv.html
-
Add the following code to the cpp
// ImageProcessAgain.cpp : Defines the exported functions for the DLL application.
//

#include "stdafx.h"

#include "opencv\cv.h"
#include "opencv\highgui.h"

extern "C"
{
	__declspec(dllexport) int exampleImageProcessing(LPCWSTR);
}

extern int __cdecl exampleImageProcessing(LPCWSTR filename)
{
	IplImage* img = cvLoadImage((char*)filename);
	return img->width;
}
-
build the dll project
-
Create a C# WPF project called UsingOpencvAgain
-
copy the dll and then include the dll within the C# project
-
Select the dll in the solution explorer, set the ‘copy to output directory’ property to ‘copy if newer’
-
Create two textboxes and a button
-
Add the following C# code to the application
using System;
using System.Collections.Generic;
using System.Linq;
using System.Text;
using System.Windows;
using System.Windows.Controls;
using System.Windows.Data;
using System.Windows.Documents;
using System.Windows.Input;
using System.Windows.Media;
using System.Windows.Media.Imaging;
using System.Windows.Navigation;
using System.Windows.Shapes;
using System.Runtime.InteropServices;

namespace UsingOpencvAgain
{
    ///
    /// Interaction logic for MainWindow.xaml
    ///
    public partial class MainWindow : Window
    {
        public MainWindow()
        {
            InitializeComponent();
        }

        [DllImport("ImageProcessAgain.dll", CallingConvention = CallingConvention.Cdecl)]
        public static extern int exampleImageProcessing(string filename);

        private void button1_Click(object sender, RoutedEventArgs e)
        {
            textBox2.Text = exampleImageProcessing(textBox1.Text).ToString();
        }
    }
}