Installing Inno Setup
When preparing a Windows installer for your application, you might need to install Inno Setup. This guide will walk you through downloading and installing Inno Setup on a Windows system. By the end, you will have the Inno Setup IDE installed and ready to create installers.
Step 1: Download the installer
Download the latest Inno Setup installer from the official site. The file is typically named is.exe.
http://www.jrsoftware.org/download.php/is.exe
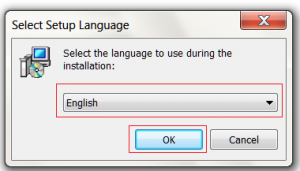
Step 2: Choose language and start the installer
Select your language from the language selector and click OK.
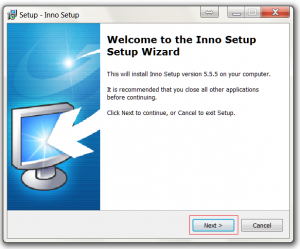
Step 3: Welcome screen
Click the Next button on the welcome screen to continue.
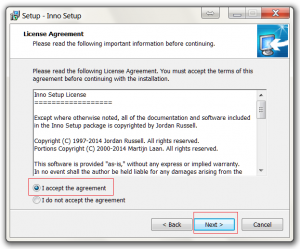
Step 4: Accept the license
Select Accept and then click Next to confirm the license terms.
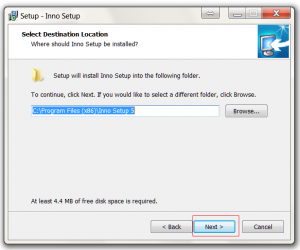
Step 5: Choose installation location
Change the installation location if required, then click Next.
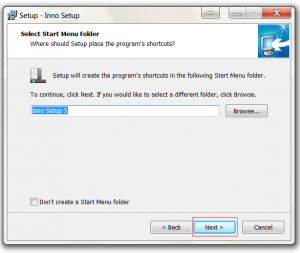
Step 6: Start menu folder
Change the start menu folder if required, then click Next.
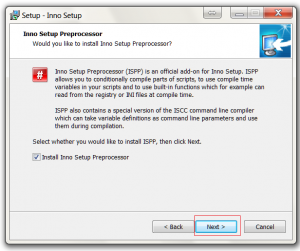
Step 7: Install the preprocessor
Click Next to install the Inno Setup preprocessor if you need it.
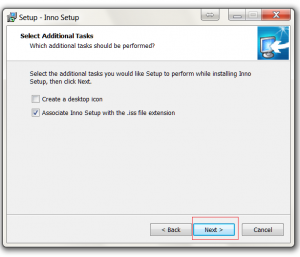
Step 8: Additional options
Enable any additional settings you want and click Next to continue.
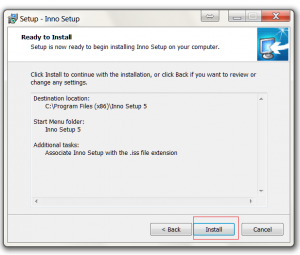
Step 9: Install
Click Install to start the installation process.
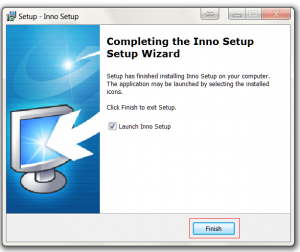
Step 10: Finish
Click Finish to complete the installation. The Inno Setup IDE will be available from your Start menu.
Conclusion
You now have Inno Setup installed on Windows and can begin creating installers for your applications. If you plan to automate builds, consider scripting your Inno scripts or using the command line version of Inno Setup.