Archive for July 2012

Detecting the Dominant points on an image using OpenCV

To detect the dominant points within an image first we must find the edges. In this example the edges are found using cvFindContours. The resulting contours are then processed to find the dominant points along the contour. This is done using the cvFindDominantPoints function, this function implements the IPAN99 algorithm to find the points. A small circle is then drawn at each dominant point.

#include "stdafx.h"
#include "cv.h"
#include "highgui.h"
#include "cvaux.h"

int _tmain(int argc, _TCHAR* argv[])
{
	// open and display input image  
    IplImage* input = cvLoadImage("test.jpg", CV_LOAD_IMAGE_GRAYSCALE);  
    cvNamedWindow("Input", CV_WINDOW_AUTOSIZE);  
    cvShowImage("Input", input); 

	// create gray scale image for edge detection
	IplImage* edge = cvCreateImage(cvGetSize(input), 8,1);

	// create output image
	IplImage* output = cvCreateImage(cvGetSize(input), 8,1);

	// threshold the input image
	cvThreshold(input, edge, 230,255, CV_THRESH_BINARY);
	cvNamedWindow("Threshold", CV_WINDOW_AUTOSIZE);
	cvShowImage("Threshold", edge);

	// generate the contours
	CvMemStorage* storage = cvCreateMemStorage();
	CvSeq* contours = NULL;
	int Nc = cvFindContours(edge, storage, &contours, sizeof(CvContour), CV_RETR_LIST);

	// diplay the contours
	printf("Total contours found = %d\n", Nc);
	cvDrawContours(output, contours, cvScalarAll(255),cvScalarAll(255),10); 

	// generate the dominant points
	CvMemStorage* dominantstorage = cvCreateMemStorage();
	CvSeq* dominant = cvFindDominantPoints(contours, dominantstorage, CV_DOMINANT_IPAN,5,15,5,170);

	printf("dominant total=%d\n", dominant->total);

	// display the dominant points
	int i, idx;
    CvPoint p;
	for ( i = 0; i < dominant->total; i++)
    {
        idx = *(int *) cvGetSeqElem(dominant, i);
        p = *(CvPoint *) cvGetSeqElem(contours, idx);
        cvDrawCircle( output, p , 1, CV_RGB(255,0,0) );
        printf("%d %d %d\n", idx, p.x, p.y);
    }
	
	// show output
	cvNamedWindow("Output", CV_WINDOW_AUTOSIZE);
	cvShowImage("Output", output);

	// wait for user
	cvWaitKey(0); 

	// garbage collection	
	cvReleaseImage(&input);
	cvDestroyWindow("Input");
	cvReleaseImage(&edge);
	cvDestroyWindow("Threshold");
	cvReleaseImage(&output);
	cvDestroyWindow("Output");
	return 0;
}

Input Image

threshold

After threshold

Output

Image Contour detection and display using OpenCV

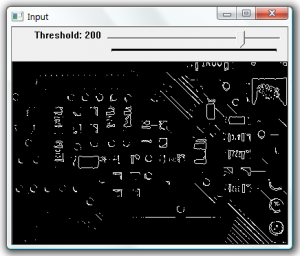
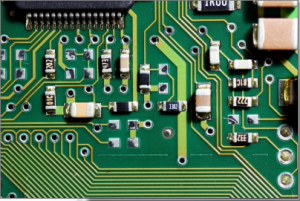
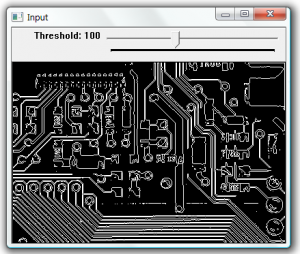
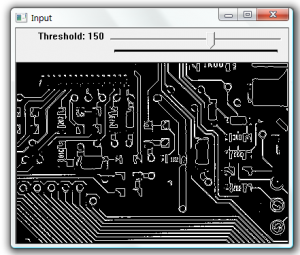
In this example we threshold the image based on the position of the track bar. Then find contours on the image an display the contours as white lines.

#include "stdafx.h"
#include "cv.h"
#include "highgui.h"

// global variables
IplImage* input = NULL;
IplImage* gray = NULL;
int threshold = 100;
CvMemStorage* storage = NULL;

/** trackbar event
 * @param trackbar position
 */
void on_trackbar(int)
{
	
	if (storage == NULL)
	{
		// create storage
		gray = cvCreateImage(cvGetSize(input), 8,1);
		storage = cvCreateMemStorage(0);
	}
	else
	{
		// clear storage
		cvClearMemStorage(storage);
	}

	// convert to gray scale and then threshold
	cvCvtColor(input, gray, CV_BGR2GRAY);
	cvThreshold(gray,gray,threshold,255,CV_THRESH_BINARY);

	// find the edges
	CvSeq* edges = 0;
	cvFindContours(gray, storage, &edges);
	cvZero(gray);
	if (edges)
	{
		// display the edges as whiet lines
		cvDrawContours(gray, edges, cvScalarAll(255),cvScalarAll(255),100);
	}
	cvShowImage("Input", gray);
}

/** main function
 * @param argc arguments
 * @param argv argument values
 * @return exit code
 */
int _tmain(int argc, _TCHAR* argv[])
{
	// open and display input image  
    input = cvLoadImage("test.jpg");  
    cvNamedWindow("Input", CV_WINDOW_AUTOSIZE);  
    cvShowImage("Input", input); 

	// create trackbar callback
	cvCreateTrackbar("Threshold", "Input", &threshold, 255, on_trackbar);
	on_trackbar(0);

	// wait for user
	cvWaitKey(0);

	// garbage collection	
	cvReleaseImage(&input);
	cvDestroyWindow("Input");
	return 0;
}

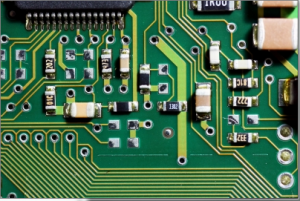
The input image

Threshold value 100

Threshold value 150

Threshold value 200

Threshold an Image using OpenCV

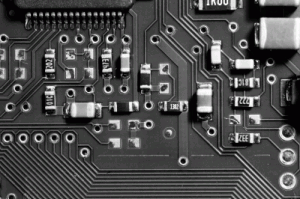
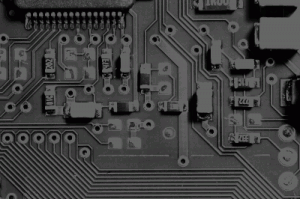
The cvThreshold function allows us to reject pixels above or below a set value while keeping the others. In this example the input image is separated into the RGB channels. Then we preform a threshold on the red channel, with a maximum value of 100. The result of this is that all the light areas of the image are removed.

#include "stdafx.h"
#include "cv.h"
#include "highgui.h"

int _tmain(int argc, _TCHAR* argv[])
{
	// open and display input image  
    IplImage* input = cvLoadImage("test.jpg");  
    cvNamedWindow("Input", CV_WINDOW_AUTOSIZE);  
    cvShowImage("Input", input); 

	// create the output images
	IplImage* channel_r = cvCreateImage(cvSize(input->width, input->height), input->depth, 1);
	IplImage* channel_g = cvCreateImage(cvSize(input->width, input->height), input->depth, 1);
	IplImage* channel_b = cvCreateImage(cvSize(input->width, input->height), input->depth, 1);

	// split the image
	cvSplit(input, channel_r, channel_g, channel_b, NULL);
	
	// display image
	cvNamedWindow("Channel R", CV_WINDOW_AUTOSIZE);
	cvShowImage("Channel R", channel_r);
	cvSaveImage("channel_r.png", channel_r);

	// threshold red channel
	IplImage* output = cvCreateImage(cvSize(channel_r->width, channel_r->height), channel_r->depth, 1);
	cvThreshold(channel_r, output, 100,100, CV_THRESH_TRUNC);

	// display the output image
	cvNamedWindow("Output", CV_WINDOW_AUTOSIZE);
	cvShowImage("Output", output);
	cvSaveImage("output.png", output);

	// wait for user
	cvWaitKey(0);

	// garbage collection	
	cvReleaseImage(&input);
	cvDestroyWindow("Input");
	cvReleaseImage(&channel_r);
	cvDestroyWindow("Channel R");
	cvReleaseImage(&output);
	cvDestroyWindow("Output");
	return 0;
}

Input Image


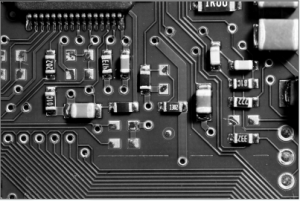
The red channel, before threshold

The red channel, after threshold

Flood Fill using OpenCV

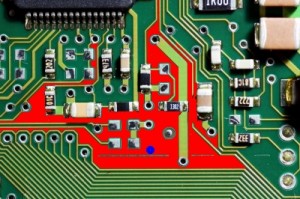
To use the flood fill, first a seed point is selected, then all neighbouring pixels of a similar colour are converted to a uniform colour. In this example the seed point is at 200, 200 (shown by a blue circle). The neighbouring pixels are then flood filled with a red colour.

#include "stdafx.h"
#include "cv.h"
#include "highgui.h"

int _tmain(int argc, _TCHAR* argv[])
{
	// load the input image
	IplImage* img = cvLoadImage("test.jpg");

	// define the seed point
	CvPoint seedPoint = cvPoint(200,200);

	// flood fill with red
	cvFloodFill(img, seedPoint, CV_RGB(255,0,0), CV_RGB(8,90,60), CV_RGB(10,100,70),NULL,4,NULL);
	
	// draw a blue circle at the seed point
	cvCircle(img, seedPoint, 3, CV_RGB(0,0,255), 3, 8);

	// show the output
	cvNamedWindow("Output", CV_WINDOW_AUTOSIZE);  
    cvShowImage("Output", img); 

	// wait for user
	cvWaitKey(0);

	// save image
	cvSaveImage("output.jpg",img);

	// garbage collection		
	cvReleaseImage(&img);
	cvDestroyWindow("Output");
	return 0;
}

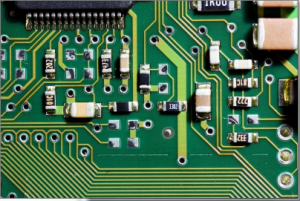
Input image

The flood filled output image

Drawing simple shapes using OpenCV

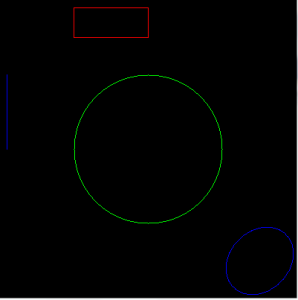
When creating Machine Vision and Image Processing Algorithms it is often useful to draw simple shape on to the image being processed. This simple example shows how to draw some basic shapes using OpenCV.

#include "stdafx.h"
#include "cv.h"
#include "highgui.h"

int _tmain(int argc, _TCHAR* argv[])
{
	// create the output image
	IplImage* output = cvCreateImage(cvSize(400,400),8,3);
	cvZero(output);

	// draw a line
	cvLine(output, cvPoint(10,100), cvPoint(10,200), CV_RGB(0,0,255), 1,8,0);

	// draw a rectangle
	cvRectangle(output, cvPoint(100,10), cvPoint(200, 50), CV_RGB(255,0,0), 1);

	// draw a circle
	cvCircle(output, cvPoint(200,200), 100, CV_RGB(0,255,0), 1, 8);

	// draw an ellipse
	cvEllipse(output, cvPoint(350,350), cvSize(40,50),45, 0, 360, CV_RGB(0,0,255),1,8);

	// show the output
	cvNamedWindow("Output", CV_WINDOW_AUTOSIZE);  
    cvShowImage("Output", output); 

	// wait for user
	cvWaitKey(0);

	// garbage collection		
	cvReleaseImage(&output);
	cvDestroyWindow("Output");
	return 0;
}
Drawing simple shapes using OpenCV

Splitting multichannel images into RGB using OpenCV

To separate a multi channel image into the three component RGB channels, we can use the cvSplit function. The example below opens a RGB image and then using the cvSplit function creates three output images.

#include "stdafx.h"
#include "cv.h"
#include "highgui.h"

int _tmain(int argc, _TCHAR* argv[])
{
	// open and display input image  
    IplImage* input = cvLoadImage("test.jpg");  
    cvNamedWindow("Input", CV_WINDOW_AUTOSIZE);  
    cvShowImage("Input", input); 

	// create the output images
	IplImage* output_r = cvCreateImage(cvSize(input->width, input->height), input->depth, 1);
	IplImage* output_g = cvCreateImage(cvSize(input->width, input->height), input->depth, 1);
	IplImage* output_b = cvCreateImage(cvSize(input->width, input->height), input->depth, 1);

	// split the image
	cvSplit(input, output_r, output_g, output_b,NULL);
	
	// display image
	cvNamedWindow("Output R", CV_WINDOW_AUTOSIZE);
	cvShowImage("Output R", output_r);

	cvNamedWindow("Output G", CV_WINDOW_AUTOSIZE);
	cvShowImage("Output G", output_g);

	cvNamedWindow("Output B", CV_WINDOW_AUTOSIZE);
	cvShowImage("Output B", output_b);

	// wait for user
	cvWaitKey(0);

	// garbage collection	
	cvReleaseImage(&input);
	cvDestroyWindow("Input");
	cvReleaseImage(&output_r);
	cvDestroyWindow("Output R");
	cvReleaseImage(&output_g);
	cvDestroyWindow("Output G");
	cvReleaseImage(&output_b);
	cvDestroyWindow("Output B");
	return 0;
}

Input Image

Blue Channel

Green Channel

Red Channel

OpenCV Hello World

Here is the Hello World example code for OpenCV. This simple example creates a image called output, then the text “Hello World” is added to the image.

#include "stdafx.h"
#include "cv.h"
#include "highgui.h"

int _tmain(int argc, _TCHAR* argv[])
{
	// create image
	IplImage* output = cvCreateImage(cvSize(400, 200), 8, 3);
	
	// create font and add text to the image
	CvFont font;
    cvInitFont(&font, CV_FONT_HERSHEY_SIMPLEX, 1,1,0,1,8);
	cvPutText(output, "Hello World", cvPoint(100,100), &font, cvScalar(255,255,0));
	
	// display image
	cvNamedWindow("Output", CV_WINDOW_AUTOSIZE);
	cvShowImage("Output", output);

	// wait for user
	cvWaitKey(0);

	// garbage collection	
	cvReleaseImage(&output);
	cvDestroyWindow("Output");
	
	return 0;
}
Hello World output image

Gaussian image smoothing using OpenCV

Image smoothing is often used in digital image processing to reduce noise or camera artifacts. An example of a common algortihm used to perform image smoothing is Gaussian. Gaussian filtering is done by convolving each pixel in the input image with a Gaussian Kernal and then summing to produce the output image.

#include "stdafx.h"
#include "cv.h"
#include "highgui.h"

int _tmain(int argc, _TCHAR* argv[])
{
	// open and display input image
	IplImage* input = cvLoadImage("test.jpg");
	cvNamedWindow("Input", CV_WINDOW_AUTOSIZE);
	cvShowImage("Input", input);

	// create the output 
	IplImage* output = cvCreateImage(cvSize(input->width, input->height), input->depth, input->nChannels);
	cvSmooth(input, output, CV_GAUSSIAN, 9);

	// display the output image
	cvNamedWindow("Output", CV_WINDOW_AUTOSIZE);
	cvShowImage("Output", output);

	// wait for user
	cvWaitKey(0);

	// garbage collection
	cvReleaseImage(&input);
	cvReleaseImage(&output);
	cvDestroyWindow("Input");
	cvDestroyWindow("Output");
	
	return 0;
}
Input image

Output Image after smoothing